marie callender pie crust baking instructions

Discover the art of baking with Marie Callender’s pie crusts, known for their flaky texture and buttery flavor, perfect for both sweet and savory creations. Marie Callender’s pie crust is a beloved choice for home bakers, offering convenience and delicious results. Whether you’re crafting a classic apple pie or an innovative savory dish, this crust delivers consistent quality and flavor, making it a staple in many kitchens. Explore the essentials of baking with Marie Callender’s pie crust, from thawing to blind baking, and unlock the secrets to a perfect pie every time.

Overview of Marie Callender Pie Crust

Marie Callender’s pie crust is a popular choice for home bakers, offering a flaky, buttery texture that enhances both sweet and savory fillings. Known for its convenience, the crust is pre-made and easy to thaw, providing a consistent base for pies. It is dairy-free, making it suitable for various dietary needs. The crust’s versatility and rich flavor have made it a favorite for crafting delicious pies, from classic apple to savory creations.

Importance of Proper Baking Techniques

Proper baking techniques are essential for achieving a perfectly baked Marie Callender pie crust. Blind baking prevents a soggy bottom, while even thawing ensures the crust bakes uniformly. Techniques like docking the crust with a fork and using pie weights help maintain shape and prevent puffing. Brushing with an egg wash enhances browning and texture. These steps ensure a golden, flaky crust that complements any filling, making proper technique crucial for a professional finish.

Thawing the Crust

Thawing the crust ensures even baking. Let the frozen crust sit at room temperature for 15-20 minutes or thaw in the refrigerator overnight. Marie Callender pie crust is ready to bake once pliable.

Instructions for Thawing Frozen Pie Crust

To thaw a frozen Marie Callender pie crust, place it at room temperature for 15-20 minutes or thaw overnight in the refrigerator. The crust is ready when it feels pliable but not soft. Avoid over-thawing, as this can cause the dough to stretch or lose its shape. Once thawed, gently unroll or place the crust in a pie dish, ensuring it fits evenly without stretching.

Time and Temperature Guidelines for Thawing

Thawing a Marie Callender pie crust typically takes 15-20 minutes at room temperature or overnight in the refrigerator. For room temperature thawing, place the crust on a flat surface, ensuring it remains cool to prevent softening. Refrigerator thawing allows for a slower, more controlled process, maintaining the crust’s structure. Avoid leaving the crust at room temperature for extended periods, as it may become too soft to handle effectively.

Blind Baking the Pie Crust

Blind baking ensures a crisp, fully cooked crust before adding fillings. Prick the bottom, line with parchment, and weigh down with pie weights or beans for best results.

What is Blind Baking?

Blind baking is pre-baking a pie crust without filling to ensure crispness and prevent sogginess. Prick the bottom, line with parchment, add weights, and bake until lightly golden. This method is essential for fillings that don’t require cooking, like creams or puddings. It ensures the crust is fully cooked before adding delicate toppings, resulting in a perfectly textured pie. Use pie weights or beans to maintain shape during baking for optimal results.

Steps to Blind Bake Marie Callender Pie Crust

To blind bake, preheat your oven to 375°F (190°C). Thaw the crust slightly, prick the bottom with a fork, and line with parchment paper. Fill with pie weights or dried beans. Bake for 12-15 minutes until edges are golden. Remove weights and parchment, then bake for an additional 5 minutes. This ensures a crisp base for fillings like creams or custards, preventing sogginess and ensuring a perfectly cooked crust.

Common Problems and Solutions

When baking Marie Callender pie crust, common issues include over-browned edges and a soggy bottom. To address these, cover edges with foil and ensure proper blind baking. Always follow package instructions for thawing and baking times to achieve a perfectly cooked crust. These simple solutions help maintain the crust’s flaky texture and prevent common baking mishaps.

Preventing Soggy Crust Bottom

To prevent a soggy crust bottom when using Marie Callender pie crust, blind baking is essential. Prick the bottom with a fork to allow steam to escape. Line the crust with parchment paper or foil, then fill with pie weights or dried beans. Bake at 375°F (190°C) for 10-15 minutes. This ensures the crust cooks evenly and stays crisp, avoiding a soggy texture when adding fillings.

Addressing Over-Browned Edges

If the edges of your Marie Callender pie crust become too brown during baking, cover them with foil or a pie shield to prevent further browning. Brushing the edges with an egg wash can also help achieve an even golden color. Ensure even heat distribution by placing the pie on a baking sheet in the center of the oven. This simple step ensures a perfectly baked crust without over-browning.

Baking Tips and Tricks

Always preheat your oven to the recommended temperature for even baking. Lightly brush the crust with an egg wash for a golden finish. Avoid overbaking to maintain flakiness.

Preheating the Oven

Preheating your oven is a crucial step in baking Marie Callender pie crust. Set your oven to the recommended temperature, typically between 375°F to 400°F, depending on the recipe. Allow the oven to preheat for at least 10-15 minutes to ensure even heat distribution. This step is essential for achieving a flaky and golden-brown crust. Proper preheating helps prevent the crust from shrinking or becoming misshapen during baking;

Using Egg Wash for a Golden Finish

Achieve a golden, professional finish on your Marie Callender pie crust by using an egg wash. Brush the crust with a beaten egg mixed with a little milk or water before baking. This step enhances browning, adds shine, and creates a visually appealing texture. Apply the egg wash after thawing and shaping the crust, ensuring an even coat. This simple technique elevates the crust’s appearance and complements its flaky texture beautifully.

Step-by-Step Baking Instructions

Preheat the oven to 375°F. Place the thawed crust on a baking sheet, brush with egg wash for a golden finish, and bake for 12-15 minutes, or until lightly browned. Follow package instructions for specific filling and baking times to ensure the perfect result.

Preparation Before Baking

Before baking, ensure the crust is properly thawed according to package instructions. Gently prick the bottom of the crust with a fork to prevent puffing during baking. Line the crust with parchment paper or aluminum foil and fill with pie weights or dried beans to maintain its shape. For a golden finish, brush the crust with an egg wash. Chill the crust in the fridge for 30 minutes before pre-baking to prevent shrinking and ensure a flaky texture.

Oven Temperature and Baking Time

Preheat your oven to 375°F (190°C) for most pie recipes. Bake the Marie Callender’s pie crust for 12-15 minutes, or until the edges start to golden. For a fully baked crust, extend the time to 20-25 minutes, ensuring a golden brown finish. Adjust the temperature and time as needed to prevent over-browning. Always follow package instructions for specific guidelines to achieve the perfect bake.

Recipes Using Marie Callender Pie Crust

Marie Callender’s pie crust is versatile for both sweet and savory creations. Enjoy classic apple pie, decadent chocolate cream pie, or savory chicken pot pie with ease and flavor.
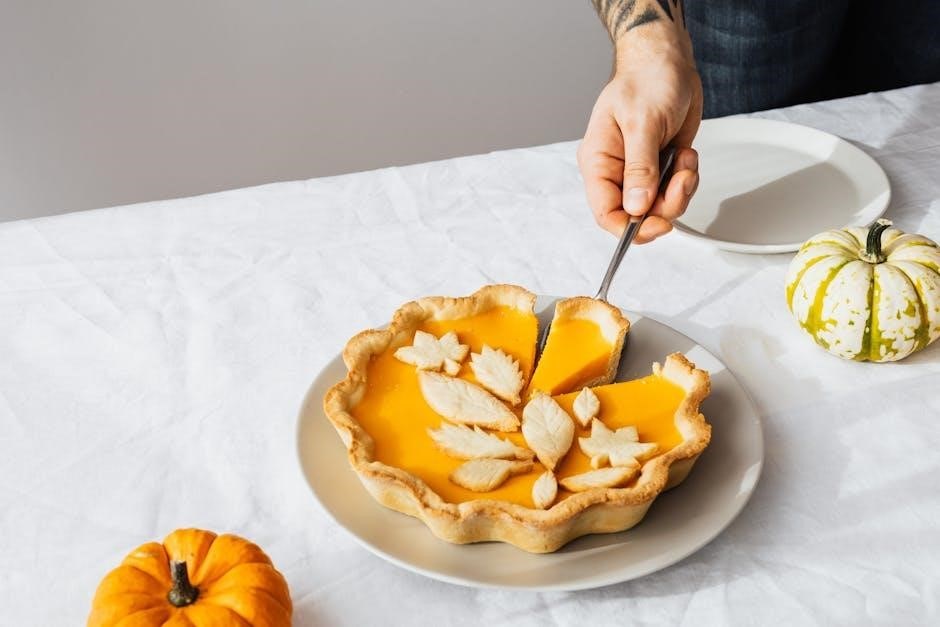
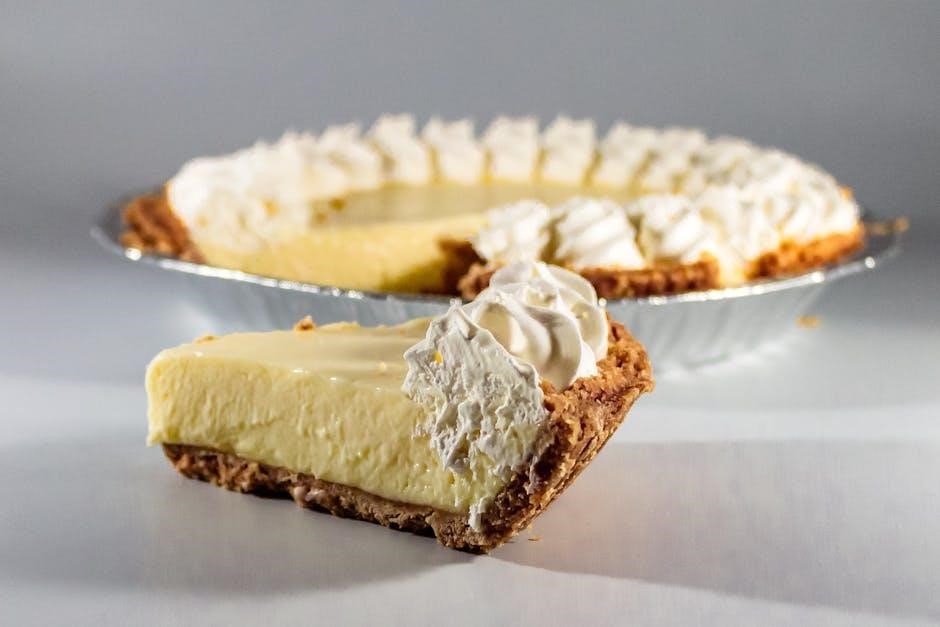
Sweet Pie Recipes

Marie Callender’s pie crust is perfect for crafting delicious sweet treats. Try a classic apple pie with tender apples and cinnamon, or a decadent chocolate cream pie. For a tangy twist, make a No-Bake Key Lime Pie by blind baking the crust first. The flaky, buttery texture pairs beautifully with sweet fillings, ensuring a mouthwatering dessert every time. Experiment with flavors like cherry, blueberry, or pecan for a variety of sweet creations.
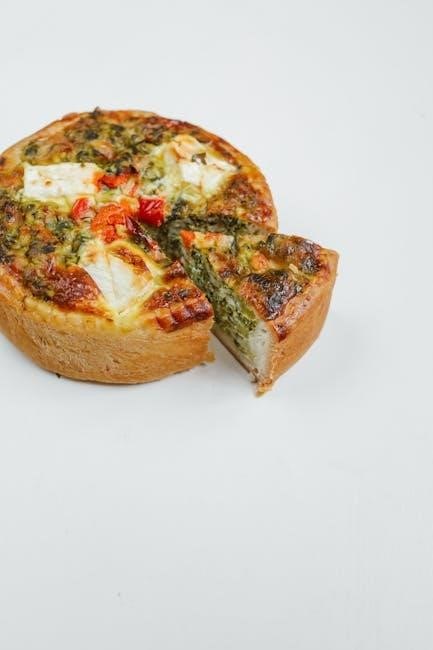
Savory Pie Recipes

Marie Callender’s pie crust is a versatile base for savory creations. Try a hearty chicken pot pie with creamy vegetables or a spinach and feta pie for a flavorful twist. For a meaty option, craft a beef and mushroom pie or a shepherd’s pie with a golden crust. Savory fillings like quiche Lorraine or broccoli cheddar also shine. Blind baking the crust ensures a crisp base, perfect for rich, satisfying savory dishes that delight any palate.

Troubleshooting Common Issues

Common issues when baking Marie Callender pie crusts include shrinking or a soggy bottom. To prevent shrinking, chill the crust before baking and dock it with a fork. For a soggy base, ensure the crust is fully thawed and blind bake it before adding fillings. Proper preheating and even oven temperature also help avoid these problems.

Why the Crust May Shrink During Baking

The Marie Callender pie crust may shrink during baking due to improper thawing or lack of chilling. Ensure the crust is fully thawed and chilled before baking to maintain its shape. Docking the crust with a fork allows steam to escape, preventing puffing and subsequent shrinkage. Using pie weights during blind baking helps retain the crust’s structure, minimizing shrinkage and ensuring a perfectly formed pie crust.

How to Achieve a Flaky Texture

To achieve a flaky texture in Marie Callender pie crust, ensure the crust is well-chilled before baking. Proper thawing and handling are key. Dock the crust with a fork to release steam, preventing puffing. Use pie weights during blind baking to maintain shape and promote even cooking. Bake at the recommended temperature and time to avoid undercooking or overbrowning, ensuring a light, flaky finish. This method guarantees a tender, layered crust for any filling.

Mastering Marie Callender pie crust baking ensures a golden, flaky crust every time. With proper techniques, achieve perfection and enjoy the joy of homemade pies baking;

Final Tips for Perfect Pie Crust

Ensure a flaky and golden crust by following these expert tips:

  • Preheat the oven to 375°F (190°C) for consistent baking.
  • Use an egg wash for a shiny finish and even browning.
  • Thaw the crust according to package instructions to maintain texture.
  • Blind bake with pie weights to prevent a soggy bottom.
  • Prick the crust with a fork to avoid puffing during baking.
  • Chill the crust before baking to minimize shrinkage.

Adhere to these guidelines for a professional-quality crust that complements any filling.

Encouragement to Experiment with Recipes

Don’t be afraid to explore beyond traditional pies! Marie Callender’s pie crust is incredibly versatile, perfect for both sweet and savory creations. Try crafting unique sweet pies like strawberry basil or salted caramel chocolate. For savory dishes, experiment with quiches, pot pies, or even appetizer tartlets. The flaky texture and buttery flavor of the crust pair beautifully with a wide range of ingredients, making it a canvas for your culinary creativity and experimentation.

scriptural rosary pdf

The Scriptural Rosary is a devotion that combines traditional prayer with biblical reflections, offering a deeper connection to faith through meditation on sacred scripture and spiritual growth;

What is a Scriptural Rosary?

A Scriptural Rosary is a prayerful devotion that combines the traditional Catholic Rosary with reflections from Sacred Scripture. It involves meditating on specific biblical passages associated with each mystery of the Rosary, enhancing the spiritual experience. This practice deepens one’s understanding of the life of Christ and the mysteries of faith. Unlike the standard Rosary, the Scriptural Rosary integrates Bible verses directly into the prayer, fostering a deeper connection to God’s Word. It is often used to enhance meditation and contemplation, making prayer more meaningful and personal. The Scriptural Rosary can be prayed individually or in groups, offering flexibility and accessibility for all who seek to grow in faith. Its structure remains rooted in Catholic tradition while adding a rich layer of scriptural insight.

Significance of the Scriptural Rosary in Catholic Devotion

The Scriptural Rosary holds profound significance in Catholic devotion as it bridges prayer and Scripture, fostering a deeper understanding of faith. By integrating biblical passages into the Rosary, it enriches the meditation on the life of Christ and the mysteries of salvation. This practice strengthens Catholics’ connection to God’s Word, making prayer more meaningful and personal. It encourages believers to reflect on the teachings of Jesus and the events of His life, reinforcing the truths of the faith. The Scriptural Rosary also serves as a tool for spiritual growth, helping individuals to live out their faith more fully. Its structured approach to prayer and reflection makes it accessible to all, deepening devotion and fostering a closer relationship with God. This devotion is a powerful way to unite prayer and Scripture, enriching the spiritual life of Catholics worldwide.

The Structure of the Scriptural Rosary

The Scriptural Rosary is structured around the traditional Rosary, with four sets of mysteries: Joyful, Sorrowful, Glorious, and Luminous, each accompanied by relevant scriptural reflections.

The Four Mysteries of the Rosary: Joyful, Sorrowful, Glorious, and Luminous

The Scriptural Rosary is divided into four sets of mysteries, each representing key events in the life of Jesus Christ and the Virgin Mary. The Joyful Mysteries focus on the early life of Jesus, including the Annunciation, Visitation, Nativity, Presentation, and the Finding in the Temple. The Sorrowful Mysteries reflect on Jesus’ Passion, such as the Agony in the Garden, Scourging at the Pillar, Crowning with Thorns, Carrying the Cross, and the Crucifixion. The Glorious Mysteries celebrate the resurrection, Ascension, Pentecost, Assumption of Mary, and her Coronation in heaven. Finally, the Luminous Mysteries, introduced by Pope John Paul II, highlight Jesus’ public ministry, including the Baptism, Wedding at Cana, Proclamation of the Kingdom, Transfiguration, and the Institution of the Eucharist. Each mystery is accompanied by relevant scriptural passages, enriching the prayer experience.

How Scripture is Integrated into Each Mystery

Each mystery of the Scriptural Rosary is deeply rooted in sacred scripture, with specific biblical passages selected to guide meditation. For example, the Joyful Mysteries include verses like Luke 1:26-38 for the Annunciation and Luke 2:1-7 for the Nativity. The Sorrowful Mysteries draw from accounts of Jesus’ Passion, such as Matthew 26:36-46 for the Agony in the Garden. The Glorious Mysteries reflect on resurrection narratives, like John 20:1-10, while the Luminous Mysteries incorporate events from Jesus’ ministry, such as Matthew 3:13-17 for His Baptism. These scriptural references provide a biblical foundation, helping believers connect with the life of Christ and the Virgin Mary. By integrating scripture, the Rosary becomes a powerful tool for contemplating the Word of God and fostering a deeper spiritual connection. This approach enriches prayer and enhances the meditative experience.

Benefits of Praying the Scriptural Rosary

Praying the Scriptural Rosary fosters spiritual growth, deepens faith, and enhances meditation, offering peace and a closer connection to Christ through sacred scripture and reflective prayer.

Deepening Your Faith Through Scripture

The Scriptural Rosary serves as a powerful tool for deepening one’s faith by integrating sacred scripture into each mystery, allowing believers to reflect on the life of Christ and the teachings of the Bible. By meditating on specific passages during each decade, individuals can gain a deeper understanding of God’s plan and the significance of key events in salvation history. This practice fosters a more personal and meaningful connection to the faith, encouraging believers to apply scriptural truths to their daily lives. The combination of prayer and scripture creates a rich, contemplative experience, helping to root faith in the word of God and inspire personal reflection and conversion.

Enhancing Meditation and Contemplation

The Scriptural Rosary enhances meditation and contemplation by providing a structured format that combines prayer with biblical reflections. Each mystery of the Rosary is accompanied by specific scripture passages, guiding the faithful to reflect on the life, death, and resurrection of Christ. This integration of scripture allows for a deeper engagement with the mysteries, fostering a more profound spiritual experience. By focusing on the word of God, individuals can quiet the mind, open the heart, and encounter Christ more intimately. The use of a Scriptural Rosary PDF further simplifies this practice, offering convenience and accessibility for those seeking to enrich their prayer life. Through this method, meditation becomes more focused, and contemplation more fruitful, leading to a greater sense of peace and union with God.

Using a Scriptural Rosary PDF

A Scriptural Rosary PDF offers convenience, accessibility, and portability, allowing individuals to pray and meditate on the go using digital devices, enhancing modern prayer practices seamlessly.

Convenience of Digital Formats for Prayer

The Scriptural Rosary PDF offers unparalleled convenience for modern prayer life. By digitizing the rosary, individuals can access it anytime, anywhere, using smartphones, tablets, or laptops. This format eliminates the need for physical prayer books, making it ideal for travelers or those with limited space. The PDF can be easily shared with others, fostering communal prayer without the hassle of distributing physical copies. Additionally, digital formats often include features like adjustable fonts and night mode, enhancing readability. They also allow for quick navigation between mysteries and reflections, streamlining the prayer experience. Furthermore, digital storage ensures that the rosary is always within reach, reducing the risk of losing or damaging a physical copy. This modern approach makes prayer more accessible and adaptable to busy lifestyles, while maintaining the sacred traditions of the rosary.

How to Incorporate the Scriptural Rosary into Daily Prayer Life

Incorporating the Scriptural Rosary into daily prayer life can be done seamlessly by setting aside a specific time each day, such as first thing in the morning or before bed. Begin by creating a quiet, distraction-free environment to focus on the prayers and reflections. Use a Scriptural Rosary PDF to guide your meditation, pausing after each mystery to contemplate the associated scripture. Consistency is key, so try to pray at the same time each day to establish a routine. You can also invite family or friends to join, fostering a sense of community and shared devotion. Additionally, consider using the PDF during commutes or breaks, making prayer a natural part of your daily activities. This practice not only deepens faith but also brings a sense of peace and structure to everyday life.

The Scriptural Rosary is a powerful tool for spiritual growth, combining faith and meditation. It offers a timeless guide to deepen your connection with God through prayer and reflection.

The Scriptural Rosary as a Powerful Tool for Spiritual Growth

The Scriptural Rosary is a profound devotion that enriches faith and deepens spiritual connection. By integrating biblical passages into each prayer, it fosters meditation and reflection, leading to a greater understanding of God’s plan. This practice encourages believers to immerse themselves in the life of Christ, drawing strength from His teachings and miracles. The Scriptural Rosary becomes a bridge between prayer and scripture, helping individuals grow in holiness and devotion. It also serves as a comforting reminder of God’s love and guidance, making it an essential tool for those seeking to strengthen their spiritual lives. Through this practice, believers can cultivate a deeper relationship with Christ, finding peace and inspiration in their daily journeys.

breadmaster bread machine manual

Welcome to the Breadmaster Bread Machine Manual, your comprehensive guide to mastering bread making; This manual provides essential information on machine operation, features, and care to ensure optimal use and delicious results.

1.1 Overview of the Breadmaster Bread Machine

The Breadmaster Bread Machine is a versatile and user-friendly appliance designed to simplify bread making at home. It offers preset cycles for various bread types, including basic, whole wheat, and gluten-free options, ensuring perfect results every time. With its durable construction and advanced features, this machine is ideal for both beginners and experienced bakers. The Breadmaster allows for customization of loaf size and crust color, catering to individual preferences. Its compact design and easy-to-use interface make it a practical addition to any kitchen, enabling users to create fresh, homemade bread effortlessly while maintaining nutritional control over ingredients.

1.2 Importance of the Manual for Optimal Use

The manual is crucial for unlocking the full potential of your Breadmaster Bread Machine. It provides detailed instructions on safety precautions, machine components, and operational guidelines, ensuring safe and effective use. By following the manual, users can understand how to properly load ingredients, select appropriate cycles, and troubleshoot common issues. It also offers tips for maintaining the machine and extending its longevity. Reading the manual thoroughly helps users avoid potential errors and ensures they achieve consistent, high-quality bread-making results. Referencing the manual regularly guarantees optimal performance and enhances the overall baking experience, making it an indispensable resource for all users.

Safety Precautions and Essential Tips

Always read the manual before use to ensure safety. Avoid overheating, keep children away, and handle hot surfaces with care. Follow electrical guidelines and ingredient measurements precisely for optimal performance and safety.

2.1 General Safety Guidelines

Always read the manual thoroughly before using the Breadmaster Bread Machine. Ensure the machine is placed on a stable, heat-resistant surface away from children. Avoid touching hot surfaces during operation, and never insert metal objects into the machine. Keep the cord away from water and heat sources to prevent damage. Regularly inspect the power cord for wear and tear. Follow the recommended ingredient measurements to avoid overloading the machine. Never leave the machine unattended while in use, and ensure it cools down completely before cleaning. Adhering to these guidelines will ensure safe and efficient operation of your Breadmaster Bread Machine.

2.2 Electrical Safety and Cord Management

Ensure the Breadmaster Bread Machine is plugged into a grounded electrical outlet rated for 120V AC. Avoid using extension cords, as they may overheat. Keep the power cord away from water, heat sources, and sharp objects to prevent damage. Do not submerge the cord in water or expose it to extreme temperatures. Regularly inspect the cord for signs of wear, such as fraying or discoloration, and replace it if necessary. Never attempt to operate the machine with a damaged cord. Store the cord neatly when not in use to avoid tripping hazards. Proper electrical safety and cord management are crucial for safe and reliable operation of your Breadmaster Bread Machine.

Description of Machine Components

The Breadmaster Bread Machine features a control panel with intuitive buttons, a durable bread pan, and a sturdy oven chamber. These components ensure efficient and consistent bread making.

3.1 Control Panel and Its Features

The control panel is the heart of the Breadmaster Bread Machine, offering easy navigation with buttons for selecting cycles, crust color, and delay start. It features a clear LCD display that shows the progress of each cycle, allowing users to monitor the bread-making process effortlessly. The panel includes options for different loaf sizes and crust preferences, ensuring customization. Additionally, it has a pause function for manual intervention if needed. The design is user-friendly, making it accessible for both beginners and experienced bakers to achieve perfect results. Regular updates ensure compatibility with various recipes and settings.

3.2 Bread Pan and Oven Chamber

The bread pan and oven chamber are essential components of the Breadmaster Bread Machine, designed for optimal bread making. The bread pan is non-stick, ensuring easy removal of baked bread and effortless cleaning. It is securely locked into the oven chamber during operation to maintain even heat distribution. The oven chamber is equipped with heating elements that evenly cook the bread, while its durable construction ensures longevity. Proper placement and alignment of the bread pan are crucial for consistent results. Regular cleaning of both components is recommended to prevent residue buildup and maintain performance. These parts work together to deliver perfectly baked loaves every time.

Operating the Breadmaster Bread Machine

Operating the Breadmaster Bread Machine involves simple, intuitive steps. Load ingredients, select your preferred cycle, and let the machine handle mixing, kneading, rising, and baking for perfect bread every time.

4.1 First-Time Setup and Initialization

Welcome to your Breadmaster Bread Machine! Before first use, carefully unpack and inspect the machine. Wash the bread pan and utensils with warm soapy water, then rinse thoroughly. Plug the machine into a nearby power outlet and ensure it is placed on a stable, heat-resistant surface. Familiarize yourself with the control panel and settings. Initialize the machine by selecting the “Test” or “Dough” cycle to ensure all functions operate smoothly. Refer to the manual for specific initialization steps. Once initialized, your Breadmaster is ready for its first use. Always follow safety guidelines and instructions for optimal performance.

4.2 Loading Ingredients and Selecting Cycles

Load ingredients into the bread pan in the recommended order: liquids first, followed by dry ingredients, and yeast last. Ensure all measurements are accurate for optimal results. Select the appropriate cycle based on your recipe, such as Basic, Whole Grain, or Rapid Bake. Choose the loaf size and crust color to suit your preference. Avoid overfilling the pan beyond the machine’s capacity. Once loaded, place the pan securely into the oven chamber and close the lid. The machine will handle mixing, kneading, rising, and baking. Always refer to the manual for specific cycle settings and ingredient ratios to achieve the best bread quality.

4.3 Understanding the Bread-Making Process

The Breadmaster Bread Machine automates the bread-making process, which includes mixing, kneading, rising, and baking. The machine first mixes the ingredients, then kneads the dough to develop gluten. Afterward, it allows the dough to rise before baking it to perfection. Understanding these stages helps you monitor progress and ensure optimal results. The machine’s sensors and timers control temperature and time for consistent outcomes. Familiarizing yourself with the process enables better troubleshooting and customization of recipes. Always follow the manual’s guidelines to align with the machine’s programmed cycles and achieve perfect loaves every time.

Recipes and Ingredients

Explore a variety of bread recipes, from classic white to whole grain, using prepackaged mixes or custom ingredients. Follow measurements and guidelines for perfect results.

5.1 Basic Bread Recipes for Beginners

Start with simple recipes like classic white bread, requiring flour, yeast, salt, sugar, and water. Prepackaged mixes simplify the process, ensuring success for new users. Follow machine guidelines for ingredient proportions to achieve ideal texture and flavor. Add ingredients in the recommended order: liquids first, then dry ingredients, and yeast last. Select the basic bread cycle and let the machine handle mixing, kneading, and baking. These recipes are perfect for mastering the basics before experimenting with advanced options.

5.2 Advanced Recipes and Customizations

Explore advanced recipes like whole grain, sourdough, or herb-infused bread by adjusting ingredients and cycles. Customize recipes by adding nuts, seeds, or spices for unique flavors. For whole grains, increase yeast slightly and opt for the longer cycle. Sourdough requires a starter and a slower rise time. Experiment with gluten-free flours for special dietary needs. Use the delay timer for convenience. Troubleshoot dough consistency by adjusting liquid levels. These customizations allow you to tailor bread to your preferences while leveraging the machine’s versatility. Advanced recipes expand your bread-making creativity and satisfaction.

Maintenance and Care

Regular cleaning and drying prevent crumbs and residue buildup. Store in a dry place, away from direct sunlight. Avoid abrasive cleaners to maintain the machine’s finish. Proper care extends its lifespan and ensures consistent performance for perfect bread every time.

6.1 Cleaning the Breadmaster Bread Machine

Cleaning your Breadmaster is essential for maintaining hygiene and performance. Always unplug the machine before cleaning. Wipe the exterior with a damp cloth and mild detergent. For the bread pan and oven chamber, remove any crumbs or dough residue. Avoid using abrasive cleaners or scourers, as they may damage the non-stick surfaces. Regularly check and clean the kneading paddle and pan to prevent old dough from hardening. After cleaning, dry all parts thoroughly to avoid rust or water spots. Proper care ensures your machine remains in optimal condition for years of reliable bread making.

6.2 Storage and Longevity Tips

To ensure your Breadmaster lasts for years, proper storage is crucial. After cleaning, dry the machine thoroughly, paying attention to crevices and the bread pan. Store it in a cool, dry place away from direct sunlight and moisture. Avoid extreme temperatures or humidity, as this can damage electrical components. Cover the machine with a breathable cloth to protect it from dust. Regularly inspect stored parts for signs of wear or rust. Proper storage maintains functionality and extends the machine’s lifespan, ensuring it remains ready for your next baking session.

6.3 Troubleshooting Common Issues

If your Breadmaster isn’t performing as expected, check for common issues like improper assembly or power supply problems. Ensure the machine is plugged in and the outlet is working. If the machine doesn’t turn on, verify the cord is securely connected. For uneven bread texture, check ingredient measurements and cycle selection. If dough sticks to the pan, ensure proper greasing and avoid overfilling. Regularly clean the machine to prevent residue buildup. Refer to the manual for resetting or adjusting settings. Addressing these issues promptly will help maintain your Breadmaster’s performance and extend its lifespan for consistent bread-making results.

Additional Tips and Tricks

Explore advanced techniques to enhance your bread-making experience. Experiment with ingredient ratios, try new recipes, and adjust settings for custom crust colors and loaf sizes effortlessly.

7.1 Optimizing Your Bread Recipes

Optimizing your bread recipes ensures consistent and delicious results. Start by measuring ingredients accurately, as precise proportions are key. Experiment with different flours, such as whole wheat or rye, and adjust yeast levels according to environmental conditions. Temperature plays a crucial role; ensure liquids are at room temperature and the environment is draft-free. Enhance flavor by adding herbs, spices, or nuts, but in moderation to avoid overcomplicating. Monitor the machine’s performance and tweak settings like crust color or cycle time based on preferences. Keep a recipe journal to track successes and refine techniques over time for personalized perfection.

7.2 Avoiding Common Mistakes

Avoiding common mistakes ensures your bread-making experience remains enjoyable and successful. Overloading the bread pan with too many ingredients is a frequent error, leading to uneven mixing and potential machine damage. Always adhere to the recommended capacity. Using expired or inactive yeast can result in poor rise; ensure yeast is fresh and stored properly. Measuring ingredients inaccurately is another pitfall—use a digital scale for precision. Neglecting to preheat or improper temperature settings can affect dough rise. Finally, opening the lid during the baking cycle disrupts the process; By addressing these issues, you can achieve consistent, high-quality bread and extend your machine’s longevity.

community and public health nursing 10th edition pdf

Overview of Community and Public Health Nursing

The 10th edition of Community and Public Health Nursing: Promoting the Public’s Health provides an engaging introduction to population-focused care, emphasizing a population-based approach to health care. This student-friendly text uses visual tools like infographics and bulleted lists to help learners transition from individual client care to community health perspectives. It highlights Quality and Safety Education for Nurses (QSEN) concepts, ensuring future nurses can address public health challenges effectively. The edition is tailored for active learners, offering updated insights on infectious diseases, disasters, and healthcare policies impacting communities globally.

The 10th edition introduces population-focused care, emphasizing a population-based approach to address community health needs. It equips nurses with tools to shift from individual care to broader community health strategies. Visual aids, real-world examples, and QSEN concepts help learners understand public health principles, preparing them to address diverse population challenges effectively while fostering disease prevention and health promotion. This approach ensures nurses are well-prepared to meet community health demands.

1.2 Key Features of the 10th Edition

The 10th edition offers enhanced visual learning with infographics and bulleted lists, making complex concepts accessible. It includes updated chapters on infectious diseases, disasters, and healthcare policies. QSEN and nursing process features integrate quality care and safety. The edition is available in print and digital formats, with a test bank and PowerPoint slides for educators, ensuring comprehensive learning support for undergraduate nursing students.

History and Evolution of Public Health Nursing

Public health nursing traces its roots to the 19th century, evolving through pioneers like Lillian Wald and the 1918 influenza pandemic, shaping modern community care practices globally.

2.1 Historical Development of Community Health Nursing

Community health nursing traces its origins to the 19th century, influenced by pioneers like Florence Nightingale and Lillian Wald. The 20th century saw significant advancements, including the establishment of public health infrastructure and the integration of preventive care. The 1918 influenza pandemic highlighted the need for population-focused nursing, leading to the formalization of community health practices. This evolution emphasized disease prevention, health education, and partnerships with communities, shaping the modern role of public health nurses.

2.2 Milestones in Public Health Nursing Practice

Key milestones include the establishment of visiting nurse services, public health infrastructure development, and the integration of evidence-based practices. The 20th century saw significant strides in infectious disease control, maternal-child health programs, and disaster response. Modern practice emphasizes population health management, addressing global challenges like pandemics and climate change, while leveraging technology to enhance community care delivery and health equity.

Core Concepts and Principles

Community and public health nursing focuses on population-based care, emphasizing prevention, health promotion, and disease prevention. It integrates evidence-based practices to address community health needs effectively, ensuring equity and accessibility.

3.1 Population-Based Approach to Health Care

The 10th edition emphasizes a population-based approach, preparing nurses to address community health challenges. This method focuses on preventing disease and promoting health across entire populations, rather than individual care. It equips nurses with tools to assess, plan, and implement interventions, ensuring equitable access to healthcare for all community members. This approach is central to modern public health nursing practice.

3.2 Evidence-Based Practice in Public Health Nursing

The 10th edition integrates evidence-based practice into public health nursing, ensuring interventions are grounded in research and best practices. It emphasizes the use of data-driven strategies to improve health outcomes and reduce disparities. Nurses learn to apply scientific evidence to decision-making, fostering effective and efficient care delivery. This approach is crucial for addressing complex public health challenges and promoting equitable healthcare access.

Roles and Responsibilities of Public Health Nurses

Public health nurses play a vital role in promoting health, preventing diseases, and protecting at-risk populations; They collaborate with communities to address health disparities and improve overall well-being through education and advocacy.

4.1 Promoting Health and Disease Prevention

Public health nurses play a crucial role in promoting health and preventing diseases through education, community engagement, and evidence-based interventions. They focus on health education strategies to empower individuals and communities, addressing risk factors and promoting healthy lifestyles. By advocating for preventive measures, such as vaccinations and screenings, nurses help reduce the burden of infectious and chronic diseases, ultimately improving population health outcomes and equity.

4.2 Protecting At-Risk Populations

Public health nurses are dedicated to protecting at-risk populations, including vulnerable groups such as children, the elderly, and those with limited access to healthcare. They address health inequities by providing targeted interventions, education, and resources to improve health outcomes. By advocating for these populations, nurses help reduce disparities and ensure equitable access to care, fostering healthier communities and promoting social justice.

Disaster Response and Emergency Preparedness

Public health nurses play a critical role in disaster response and emergency preparedness, addressing both natural and man-made disasters. They focus on risk reduction, coordination of emergency services, and fostering community resilience to ensure prompt and effective care during crises.

5.1 Natural and Man-Made Disasters

Natural disasters, such as hurricanes and earthquakes, and man-made disasters, like chemical spills or bioterrorism, pose significant threats to public health. These events require coordinated responses to mitigate harm, protect vulnerable populations, and restore communities. Public health nurses play a vital role in disaster preparedness, emergency response, and recovery efforts, ensuring equitable access to care and resources during crises.

5.2 Role of Nurses in Disaster Management

Public health nurses play a critical role in disaster management by conducting needs assessments, providing emergency care, and coordinating relief efforts. They ensure access to essential services, address mental health needs, and promote health education. Collaboration with emergency teams and community leaders is vital to safeguard populations and reduce long-term health impacts, ensuring equitable care during crises.

Healthcare Policies and Community Impact

Healthcare policies significantly influence community well-being by shaping access to services, preventive care, and health equity. Public health nurses advocate for policies that address disparities and promote affordable, equitable care, ensuring communities receive necessary support for healthier outcomes.

6.1 Impact of Healthcare Policies on Communities

Healthcare policies profoundly influence community health by shaping access to care, preventive services, and health equity. The 10th edition highlights how policies affect disease prevention, mental health services, and disaster preparedness. Public health nurses play a crucial role in advocating for policies that reduce disparities and promote affordable, equitable care, ensuring communities receive the support needed for healthier outcomes and improved quality of life.

6.2 Advocacy in Public Health Nursing

Advocacy is a cornerstone of public health nursing, empowering nurses to influence policies and legislation that promote health equity and access to care. The 10th edition emphasizes nurses’ role in championing vulnerable populations, addressing disparities, and ensuring affordable, equitable services. By advocating for policy changes, public health nurses drive systemic improvements, fostering healthier communities and supporting marginalized groups in achieving better health outcomes and quality of life.

Technology and Innovation in Public Health Nursing

The 10th edition explores the integration of digital tools and telehealth in public health nursing, enhancing community engagement and improving health outcomes through innovative care delivery methods.

7.1 Use of Digital Tools in Community Health

The 10th edition highlights the role of digital tools in enhancing community health outcomes. It emphasizes the use of mobile apps, patient portals, and data analytics to improve health education and monitoring. These tools enable public health nurses to track population health trends, facilitate remote patient interactions, and streamline data collection. The integration of technology empowers nurses to deliver personalized and efficient care, addressing diverse community needs effectively.

7.2 Telehealth and Remote Care Delivery

The 10th edition underscores the growing importance of telehealth in delivering remote care, especially for underserved populations. Telehealth innovations enable nurses to provide virtual consultations, monitor chronic conditions, and educate communities remotely. This approach enhances access to care, reduces healthcare disparities, and supports population health management. The text highlights how telehealth tools empower public health nurses to address health challenges efficiently, particularly in resource-limited settings.

Education and Community Engagement

The 10th edition emphasizes health education strategies and community partnerships, empowering nurses to promote health literacy and disease prevention through interactive, population-focused approaches and visual tools.

8.1 Health Education Strategies

The 10th edition highlights effective health education strategies, emphasizing interactive approaches to promote health literacy and disease prevention. It incorporates visual tools like infographics and bulleted lists to engage learners, ensuring they can design culturally competent education programs. The text underscores the importance of tailoring strategies to diverse populations, addressing health inequities, and fostering community partnerships to improve health outcomes.

8.2 Building Partnerships with Communities

The 10th edition emphasizes the importance of fostering collaborations between nurses and community leaders to address health inequities; It highlights strategies for building trust and cultural competence, ensuring partnerships are inclusive and responsive to community needs. By empowering communities and promoting shared decision-making, nurses can create sustainable solutions, enhancing health outcomes and fostering long-term positive change through collective efforts.

Vulnerable Populations and Health Disparities

The 10th edition addresses health inequities among vulnerable populations, emphasizing cultural competence and strategies to reduce disparities, ensuring equitable care for all communities and individuals.

9.1 Addressing Health Inequities

The 10th edition emphasizes strategies to address health inequities, focusing on evidence-based interventions and cultural competence. It highlights the importance of outreach programs, policy advocacy, and community partnerships to reduce disparities. By equipping nurses with tools to identify and mitigate systemic barriers, the text promotes equitable care for marginalized populations, ensuring their unique needs are met effectively.

9.2 Cultural Competence in Nursing Practice

The 10th edition underscores the importance of cultural competence in nursing practice, providing strategies to address diverse patient needs. It emphasizes the role of self-awareness, cultural assessments, and communication techniques to deliver inclusive care. By fostering cultural sensitivity, nurses can better serve diverse populations, ensuring respectful and effective health interventions that promote positive community health outcomes.

Global Perspectives in Public Health Nursing

The 10th edition highlights global health challenges and the role of nurses in addressing them. It explores international collaborations and strategies to improve health equity worldwide.

10.1 Global Health Challenges

The 10th edition addresses global health challenges such as infectious diseases, natural disasters, and healthcare disparities. It emphasizes a population-based approach to tackle these issues, preparing nurses to work in diverse global settings. The text highlights the importance of international collaboration and strategies to promote health equity worldwide, ensuring nurses are equipped to address complex public health issues on a global scale.

10.2 International Collaboration in Public Health

The 10th edition emphasizes international collaboration in addressing global health issues, fostering partnerships to combat infectious diseases and health disparities. It highlights strategies for promoting health equity and strengthening global health systems, ensuring nurses are prepared to collaborate across borders to improve public health outcomes worldwide.

Future Trends in Community and Public Health Nursing

The 10th edition explores emerging trends like telehealth, disaster preparedness, and global health challenges, preparing nurses for future public health demands and innovative care delivery methods.

11.1 Emerging Issues in Public Health

The 10th edition highlights emerging public health challenges, including climate change impacts, pandemics, and mental health disparities. It emphasizes the need for adaptive strategies to address these issues, ensuring nurses are prepared to handle evolving crises and promote equitable care for diverse populations, aligning with global health trends and innovative solutions.

11.2 Evolving Roles of Public Health Nurses

The 10th edition underscores the expanding roles of public health nurses in addressing emerging challenges, such as disaster response and telehealth. Nurses are increasingly expected to adapt to technological advancements, advocate for policy changes, and lead community-based initiatives. This evolution equips nurses with the skills to navigate complex health crises, ensuring they remain pivotal in promoting population health and equity in a rapidly changing world.

Resources and References

The 10th edition provides ISBNs for both print (9781975123048) and digital formats, ensuring easy access to the textbook. Supplementary materials, such as test banks and PowerPoint slides, support comprehensive learning and teaching. Readers can find additional resources, including recommended readings and tools, to deepen their understanding of public health nursing practices and principles.

12.1 Recommended Readings and Tools

The 10th edition offers recommended readings and tools to enhance learning, including test banks, PowerPoint slides, and supplementary materials. The ISBN 9781975123048 provides access to digital resources, while platforms like Open Library offer free PDFs for additional study. These resources support a deeper understanding of public health nursing principles and practices, aiding both students and educators in their academic and professional pursuits.

12.2 Accessing the 10th Edition PDF

The 10th edition PDF can be accessed by purchasing the eTextbook from platforms like VitalSource or directly through the publisher. After purchase, an instant download link is provided, and an alternate link is sent via email. Additionally, platforms such as Open Library offer free PDF downloads of the 10th edition, making it accessible for students and professionals alike. The ISBN 9781975123062 ensures easy identification for download.

twilight new moon pdf

The Twilight Saga‚ based on Stephenie Meyer’s books‚ is a captivating series blending romance and fantasy․ It follows Bella Swan’s journey in a world of vampires and werewolves‚ exploring forbidden love and supernatural conflicts that captivate audiences worldwide․

Overview of the Series and Its Popularity

The Twilight Saga‚ based on Stephenie Meyer’s novels‚ is a global phenomenon‚ grossing over 3․36 billion worldwide․ The series includes five films: Twilight (2008)‚ New Moon (2009)‚ Eclipse (2010)‚ Breaking Dawn Part 1 (2011)‚ and Breaking Dawn Part 2 (2012)․ Its massive fan base‚ particularly among young audiences‚ propelled it to cultural icon status‚ blending romance‚ fantasy‚ and supernatural drama․ The books have sold over 100 million copies worldwide‚ translated into 37 languages‚ solidifying Meyer’s legacy as a bestselling author․ The saga’s success lies in its exploration of forbidden love and supernatural conflicts‚ resonating deeply with fans and cementing its place in pop culture history․

The Book “New Moon” by Stephenie Meyer

New Moon is the second book in the Twilight Saga‚ exploring Bella Swan’s emotional turmoil after Edward Cullen’s departure‚ her friendship with Jacob Black‚ and supernatural secrets․

Plot Summary and Key Themes

In New Moon‚ Bella Swan faces heartbreak after Edward Cullen leaves Forks‚ believing it will protect her․ Her world crumbles‚ leading to depression and isolation․ She finds solace in Jacob Black‚ who harbors a secret: he and his tribe are werewolves‚ sworn to protect Bella from Victoria‚ seeking revenge for her partner’s death․ Bella learns Edward believes she died and plans to expose himself as a vampire in Italy‚ prompting her to rush to save him․ Themes of love‚ loss‚ and self-discovery dominate‚ as Bella navigates her identity and the supernatural conflicts surrounding her․ The novel explores the struggle between human and supernatural worlds‚ highlighting sacrifice and enduring love․

Character Development in New Moon

Bella Swan undergoes significant emotional growth in New Moon‚ transitioning from a dependent teenager to a resilient individual․ Her relationship with Edward Cullen ends abruptly‚ forcing her to confront grief and isolation․ Jacob Black evolves from a supportive friend to a potential love interest‚ revealing his werewolf identity and deepening his bond with Bella․ Edward‚ though absent‚ grapples with his decision to leave‚ showcasing his internal conflict and devotion to Bella’s safety․ The characters’ development highlights themes of resilience‚ loyalty‚ and identity‚ as they navigate supernatural challenges and personal struggles‚ ultimately shaping their roles in the broader saga․

The Film Adaptation of “New Moon”

The Twilight Saga: New Moon‚ released in 2009‚ was directed by Chris Weitz․ Starring Kristen Stewart and Robert Pattinson‚ it became a box office hit‚ captivating fans worldwide․

Production Details and Casting Choices

The Twilight Saga: New Moon was directed by Chris Weitz and released in 2009․ The film‚ based on Stephenie Meyer’s novel‚ had a budget of $50 million and was filmed in locations like Vancouver and Italy․ Kristen Stewart reprised her role as Bella Swan‚ while Robert Pattinson returned as Edward Cullen․ Taylor Lautner’s portrayal of Jacob Black gained significant attention․ The casting choices were crucial‚ with actors selected for their ability to portray complex emotional depth․ The film’s score‚ composed by Alexandre Desplat‚ enhanced its atmospheric tone․ The production team focused on balancing action and romance‚ appealing to both fans of the books and new audiences․ This blend contributed to its global box office success‚ grossing over $700 million worldwide․

Reception and Box Office Performance

The Twilight Saga: New Moon achieved significant commercial success‚ grossing over $709 million worldwide․ It broke box office records‚ including the highest single-day gross in the U․S․ Fans of the book series eagerly supported the film‚ contributing to its massive opening weekend․ Despite mixed reviews from critics‚ who praised its visuals but criticized its pacing‚ the movie resonated deeply with its target audience․ The film’s success solidified the Twilight Saga’s cultural impact‚ making it a defining franchise of the late 2000s․ Its performance underscored the power of adapting popular young adult literature into cinema‚ appealing to both loyal readers and new viewers alike․

Key Characters in “New Moon”

Bella Swan‚ Edward Cullen‚ and Jacob Black are central to the story‚ with the Cullen family and the werewolf pack playing pivotal roles in shaping the plot and conflicts․

Bella Swan and Her Emotional Journey

Bella Swan‚ portrayed by Kristen Stewart‚ undergoes profound emotional growth in New Moon․ After Edward’s departure‚ she experiences deep despair and isolation‚ struggling to cope without him․ Her relationship with Jacob Black provides solace‚ but the bond she shares with Edward remains unbreakable․ Throughout the novel‚ Bella’s resilience and determination are tested as she navigates love‚ loss‚ and self-discovery․ Her journey is marked by intense emotional turmoil‚ highlighting her strength and devotion․ The character’s development in New Moon is pivotal‚ showcasing her transformation from a vulnerable teenager to a stronger‚ more independent individual․

Edward Cullen and the Cullen Family

Edward Cullen‚ played by Robert Pattinson‚ is a central figure in the Twilight Saga‚ embodying the enigmatic and mysterious vampire․ In New Moon‚ his absence leaves Bella heartbroken‚ yet his protective nature persists․ The Cullen family‚ consisting of Carlisle‚ Esme‚ Alice‚ Jasper‚ and Rosalie‚ are uniquely bonded by their vampiric existence․ Their harmonious dynamics and unwavering loyalty to one another are central to the story․ Edward’s actions‚ driven by his deep love for Bella and a desire to protect her‚ highlight his noble character․ The Cullens’ extraordinary abilities and moral code set them apart‚ making them pivotal to the plot’s progression and Bella’s ultimate destiny․

Jacob Black and the Werewolf Pack

Jacob Black‚ portrayed by Taylor Lautner‚ evolves from a childhood friend to a key figure in Bella’s life․ In New Moon‚ Jacob’s werewolf identity emerges‚ revealing his role as a protector․ The Quileute werewolf pack‚ led by Jacob‚ plays a crucial role in defending Bella against threats․ Jacob’s unwavering loyalty and deep affection for Bella create a complex dynamic‚ especially as she grapples with her feelings for Edward․ The werewolf pack’s ancient traditions and their alliance with the Cullens add depth to the story‚ highlighting the intricate relationships between humans and supernatural beings in Forks․

Themes and Symbolism in “New Moon”

New Moon explores themes of love‚ loss‚ and danger‚ symbolizing Bella’s emotional turmoil through the absence of Edward and her bond with Jacob‚ reflecting inner conflict and growth․

Love‚ Loss‚ and Self-Discovery

In New Moon‚ Bella Swan faces profound emotional challenges‚ grappling with the absence of Edward and her deepening bond with Jacob․ The novel explores themes of love‚ loss‚ and self-discovery‚ as Bella navigates her identity beyond her relationship with Edward․ Her journey reflects the pain of heartbreak and the struggle to find purpose in a world without the one she loves․ Through her interactions with Jacob‚ Bella discovers new aspects of herself and learns to balance her emotions․ The story highlights the resilience of the human spirit‚ as Bella confronts grief and emerges stronger‚ ultimately finding a sense of self beyond her romantic entanglements․ This emotional evolution is central to the narrative‚ making New Moon a poignant exploration of personal growth and transformation․

The Struggle Between Humans and Supernaturals

In New Moon‚ the conflict between the human and supernatural worlds intensifies․ Bella‚ caught between her love for Edward‚ a vampire‚ and her friendship with Jacob‚ a werewolf‚ faces the challenges of bridging these two realms․ The novel highlights the inherent dangers of human-supernatural interactions‚ as seen through the threats posed by rogue vampires and the Volturi’s strict enforcement of secret-keeping․ Jacob’s transformation into a werewolf deepens the divide‚ as ancient conflicts between vampires and werewolves resurface․ Bella’s role as a mediator underscores the fragile coexistence between these worlds‚ emphasizing the risks and sacrifices required to maintain harmony․ This struggle not only drives the plot but also enriches the thematic depth of the story‚ exploring loyalty‚ duty‚ and the enduring power of love across boundaries․

Fan Reaction and Cultural Impact

The Twilight Saga‚ including New Moon‚ sparked a global fan phenomenon‚ inspiring fan art‚ fan fiction‚ and dedicated communities․ Its impact on pop culture is undeniable‚ shaping vampire lore and influencing media․

Fandom Growth and Fan-Made Content

The Twilight Saga‚ particularly New Moon‚ ignited a massive fan base‚ inspiring countless fan-made content‚ including fan fiction‚ art‚ and videos․ Fans worldwide created communities‚ sharing their interpretations of the story and characters․ The series’ success fueled conventions‚ fan sites‚ and social media groups‚ where enthusiasts debated plotlines and character relationships․ Fan fiction platforms like FanFiction․net host thousands of Twilight-inspired stories‚ showcasing the creative impact of Meyer’s work․ This grassroots engagement not only expanded the saga’s reach but also highlighted its cultural relevance‚ turning it into a phenomenon that transcended the books and films․ The fandom’s dedication continues to grow‚ proving the series’ lasting influence on pop culture․

Cultural Significance of the Twilight Saga

The Twilight Saga has left an indelible mark on popular culture‚ reshaping the young adult genre and vampire lore․ Its blend of romance‚ fantasy‚ and relatable teen struggles resonated globally‚ making it a cultural phenomenon․ The series not only spawned a successful film franchise but also influenced music‚ fashion‚ and social media․ It redefined the vampire archetype‚ transforming them into romantic‚ sympathetic figures․ The books and films sparked widespread discussions about forbidden love‚ self-discovery‚ and supernatural themes‚ appealing to diverse audiences․ The saga’s success also launched the careers of its stars‚ Kristen Stewart and Robert Pattinson‚ and inspired countless fan creations․ Its enduring popularity highlights its role in shaping modern pop culture and literature․

schott ceran stove top manual

Schott Ceran stove tops are high-quality glass-ceramic surfaces designed for durability and modern cooking convenience․ They offer easy maintenance‚ sleek designs‚ and compatibility with various cooking methods‚ making them a popular choice for home cooks and professionals alike․

What is Schott Ceran Cooktop?

Schott Ceran cooktops are high-quality glass-ceramic surfaces engineered for durability and modern cooking convenience․ Made from a unique glass-ceramic material‚ they combine aesthetic appeal with exceptional heat resistance and scratch resistance․ These cooktops are designed to withstand heavy use and are compatible with gas‚ electric‚ and induction cooking methods․ Their smooth‚ non-porous surface ensures easy cleaning and maintenance‚ making them a practical choice for everyday use․ Schott Ceran cooktops are known for their energy efficiency and quick heat distribution‚ allowing for precise temperature control․ They are also equipped with safety features such as automatic shut-off and child safety locks‚ ensuring a secure cooking environment․ Designed to retain their sleek appearance over time‚ Schott Ceran cooktops are a popular choice for both home cooks and professional chefs․

Safety Precautions

Always follow safety guidelines to prevent accidents․ Avoid placing hot pan covers on the glass surface‚ and never let cookware boil dry․ Keep objects from falling on the cooktop‚ and ensure it is properly installed and earthed․ Use the hob lock to prevent accidental activation‚ and keep children away while cooking․ Regularly inspect the surface for damage‚ and avoid submerging the cooktop in water․ Follow the manual’s instructions for safe operation and maintenance to ensure longevity and safety․

General Safety Warnings

Always adhere to safety guidelines to ensure safe operation of your Schott Ceran stove top․ Never place hot pan covers directly on the glass surface‚ as this can cause damage․ Avoid letting cookware boil dry‚ as it may lead to overheating or damage to the cooktop․ Prevent objects or cookware from falling on the surface‚ as this can result in cracks or breakage․ Ensure the cooktop is installed and earthed by a qualified technician to prevent electrical hazards․ Regularly inspect the surface for any signs of damage‚ and avoid using the cooktop if it is cracked or chipped․ Keep the cooktop away from water or liquid to prevent electrical issues․ Use only recommended cleaning agents to avoid damaging the glass-ceramic surface․ Always switch off the cooktop before cleaning or performing maintenance․ Follow the manufacturer’s instructions for safe operation and maintenance to ensure longevity and safety․

Child Safety Features

Schott Ceran stove tops are designed with child safety in mind‚ offering features that prevent accidental activation and ensure a secure cooking environment․ The hob can be protected against being accidentally turned on‚ ensuring children cannot switch on the hotplates unintentionally․ This feature provides peace of mind for parents‚ knowing that the stove top remains safe even when little ones are around․ Additionally‚ the stove top’s controls are designed to prevent unauthorized access‚ further enhancing safety․ These features work seamlessly to create a safe kitchen environment‚ allowing parents to cook with confidence while keeping their children protected from potential hazards․

Installation and Setup

Proper installation of Schott Ceran stove tops requires a qualified professional to ensure safety and efficiency․ The appliance must be correctly earthed and installed according to the manual․

Proper Installation Requirements

Proper installation of Schott Ceran stove tops requires adherence to specific guidelines to ensure safety and optimal performance․ The cooktop must be installed by a qualified professional‚ following the instructions provided in the user manual․ It is crucial to ensure the appliance is correctly earthed to prevent electrical hazards․ The installation area must be level‚ clean‚ and free from any flammable materials․ Additionally‚ the cooktop should not be submerged in water or exposed to excessive moisture․ Compatibility with your home’s electrical and heating systems is essential‚ and the manual provides detailed specifications for a secure setup․ Always verify that the cooktop is installed in accordance with local safety standards and manufacturer recommendations to guarantee long-term durability and efficiency․

Operating the Schott Ceran Cooktop

Operating the Schott Ceran Cooktop is straightforward with its intuitive controls and safety features‚ ensuring efficient cooking while maintaining durability and ease of use․

Starting Up the Cooktop

Before using your Schott Ceran cooktop for the first time‚ ensure it is properly installed and aligned with the provided manual instructions․ Always read the user manual to understand the specific startup procedures for your model․ Turn on the cooktop by pressing the designated power button or knob‚ depending on your model․ For induction models‚ ensure compatible cookware is placed on the surface before activation․ Avoid placing hot pan covers directly on the glass surface‚ as this can cause damage․ Do not let cookware boil dry‚ as it may harm the cooktop․ Keep objects away from the control panel to prevent accidental activation․ For added safety‚ activate the child safety lock if available․ Regular cleaning after use will help maintain its performance and longevity․ Always follow the manufacturer’s guidelines for a smooth and safe startup process․

Basic Cooking Controls and Functions

Schott Ceran cooktops feature intuitive controls designed for precise cooking management․ The touch-sensitive interface or ergonomic knobs allow easy adjustment of heat levels․ LED indicators provide clear visibility of active cooking zones․ For induction models‚ the control bar enables flexible heat settings for compatible cookware․ Timers can be set to monitor cooking durations‚ ensuring dishes are prepared to perfection․ The cooktop also includes a child safety lock to prevent accidental activation․ To operate‚ simply place cookware on the designated zone and adjust the controls as needed․ Avoid using metal objects on the touch surface to prevent scratches․ Always ensure cookware is compatible with the cooktop type (e․g․‚ induction or ceramic)․ Regularly cleaning the surface ensures optimal performance of the controls and functions․ Follow the manual’s guidelines for specific model features and operation․

Cleaning and Maintenance

Regular cleaning prevents wear and tear․ Use a metal scraper for coarse debris‚ then rub with cleaning solution․ Avoid abrasive cleaners or metal utensils to prevent scratches․ Follow manual guidelines for deep cleaning and maintenance to preserve the cooktop’s appearance and functionality over time․

Daily Cleaning Tips

To maintain your Schott Ceran stove top‚ clean it after every use․ Start by removing food residue with a metal scraper‚ then wipe the surface with a damp cloth․ Apply a few drops of a recommended cleaning solution‚ such as Ceran cleaner‚ and rub gently with a soft cloth or sponge․ Avoid using abrasive cleaners‚ bleach‚ or metal utensils‚ as they can scratch the glass-ceramic surface․ For tougher stains‚ let the cleaner sit for a few minutes before wiping clean․ Never use harsh chemicals or scouring pads‚ as they can damage the cooktop․ After cleaning‚ dry the surface with a soft‚ lint-free cloth to prevent water spots and maintain its glossy finish․ Regular daily cleaning prevents grime buildup and keeps your Schott Ceran stove top looking like new․

Deep Cleaning and Scratching Prevention

For deep cleaning your Schott Ceran stove top‚ start by removing stubborn stains or grime buildup․ Use a metal cleaning scraper to gently scrape away tough residue‚ ensuring not to apply excessive pressure that could scratch the surface․ Apply a small amount of Ceran cleaner or a specialized glass-ceramic cleaning product‚ and use a soft‚ non-abrasive cloth or sponge to rub the area in circular motions․ Avoid using harsh chemicals‚ bleach‚ or abrasive scrubbers‚ as they can damage the glass-ceramic surface․ After cleaning‚ rinse the cloth thoroughly and wipe the surface clean to remove any residue․ To prevent scratches‚ avoid placing metal utensils or cookware directly on the cooktop and always lift pots and pans instead of sliding them․ Regular deep cleaning and proper care will help maintain the cooktop’s appearance and longevity․

Troubleshooting Common Issues

Identify and resolve common problems like uneven heating or error lights․ Check cookware compatibility‚ ensure proper installation‚ and avoid using abrasive cleaners to prevent scratches and damage․

Identifying and Resolving Common Problems

Common issues with Schott Ceran stove tops include error lights‚ uneven heating‚ or cookware incompatibility․ Start by checking the user manual for specific error codes‚ as they often indicate the root cause․ Ensure cookware is compatible with the cooktop‚ as unsuitable materials can cause poor performance․ For uneven heating‚ verify that the cookware base is flat and clean․ Avoid using abrasive cleaners‚ as they can scratch the surface․ If the cooktop is not heating‚ check the power connection and ensure the appliance is properly installed․ For persistent issues‚ consult the troubleshooting guide or contact customer support․ Regular maintenance‚ such as cleaning after each use‚ can prevent many problems․ Always follow the manufacturer’s instructions to maintain the longevity and efficiency of your Schott Ceran stove top․

Following the manual ensures longevity and efficiency of your Schott Ceran stove top․ Regular cleaning‚ proper cookware‚ and adhering to safety guidelines will maintain its performance and appearance․

Final Tips for Longevity and Efficiency

To ensure your Schott Ceran stove top remains in optimal condition‚ follow these essential tips․ Regularly clean the surface after each use‚ using recommended cleaners to prevent scratches․ Avoid using metal utensils or abrasive materials‚ as they can damage the glass-ceramic surface․ Always use cookware with smooth‚ flat bottoms to distribute heat evenly and prevent thermal shock․ Never place hot pans directly on the surface; use trivets or heat-resistant mats instead․ Keep the cooktop dry to avoid water spots and maintain its sleek appearance․ For tougher stains‚ apply a cleaning solution and let it sit before wiping clean․ Avoid using harsh chemicals or scrubbers‚ as they can dull the finish․ Finally‚ refer to the manual for specific guidelines on compatible cookware and heating systems to maximize efficiency and longevity․

ferris wheel knex instructions

Building a K’NEX Ferris wheel is a fun and creative engineering challenge. It allows you to bring your imagination to life while learning about mechanics and structure. With detailed instructions and patience‚ you can construct a fully functional Ferris wheel that rotates smoothly and stands tall. This project is perfect for K’NEX enthusiasts of all skill levels‚ offering a sense of accomplishment and joy in creating something truly impressive.

1.1 Overview of K’NEX and Its Creative Possibilities

K’NEX is a versatile building system featuring rods and connectors that inspire creativity and innovation. With its unique interlocking pieces‚ builders of all ages can create intricate structures‚ from simple toys to complex machines. This toy fosters problem-solving skills and encourages users to experiment with designs‚ making it an excellent tool for learning and self-expression. Its limitless possibilities make it a favorite among hobbyists and educators alike.

1.2 Importance of Following Instructions for Complex Builds

Following instructions is crucial for successfully assembling a K’NEX Ferris wheel. Each step ensures structural integrity and proper functionality. Skipping or misinterpreting steps can lead to instability or mechanical failures. By adhering to the guide‚ builders can avoid common pitfalls and achieve a smooth‚ operational Ferris wheel‚ enhancing their overall building experience and satisfaction with the final result.

Gathering Materials and Tools

Gather all K’NEX rods‚ connectors‚ and specialized pieces like gears and motors. Ensure you have tools like Allen wrenches and a sturdy work surface for assembly.

2.1 Essential K’NEX Pieces Required for the Ferris Wheel

The K’NEX Ferris wheel requires specific pieces‚ including long rods for the frame‚ connectors for joints‚ and smaller rods for details. Gears and motors are crucial for rotation‚ while wheels and seats add functionality. Ensure you have enough orange connectors for stability and steel rods for structural support. These components are vital for constructing a sturdy and functional Ferris wheel design.

2.2 Tools You Might Need for Assembly

For assembling the K’NEX Ferris wheel‚ you may need tools like an Allen wrench for tightening‚ a screwdriver for motor installation‚ and pliers for gripping small parts. A rubber mallet can help tap pieces into place without damaging them. Additionally‚ clamps or a vice can stabilize the structure during assembly‚ and a clean‚ flat work surface is essential for organizing and building efficiently.

Understanding the Mechanics of a Ferris Wheel

A Ferris wheel operates by rotating a large‚ circular structure supported by a sturdy frame. Its mechanics involve gears‚ motors‚ and balanced weight distribution for smooth operation.

3.1 How the Wheel Rotates and Supports Weight

The Ferris wheel rotates smoothly due to its balanced design and gear system. The frame distributes weight evenly‚ while the motor powers the rotation. Strong rods and connectors provide structural integrity‚ ensuring stability and safety as the wheel turns. Proper alignment of these components is crucial for maintaining balance and preventing wobbling during operation.

3.2 The Role of Gears and Motors in Rotation

Gears play a crucial role in transferring power within the Ferris wheel‚ ensuring smooth rotation. The motor provides the necessary torque to initiate and maintain movement. Proper alignment of gears and motors is essential for efficient operation‚ while lubrication can reduce friction. This synchronized system allows the wheel to rotate steadily‚ supporting the weight of the seats and riders with precision and reliability.

Step-by-Step Assembly Instructions

Begin by constructing the base for stability‚ then build the Ferris wheel frame using rods and connectors. Attach seats securely and install the motor for rotation. Follow detailed steps carefully to ensure proper assembly and functionality‚ testing each component as you go to achieve a smooth and operational Ferris wheel.

4.1 Building the Base Structure

Start by assembling the base using flat rods and gray connectors to create a sturdy foundation. Ensure all connections are secure and evenly spaced for stability. Use triangular brackets to reinforce corners and prevent wobbling. Attach the base plate firmly‚ ensuring it is level and balanced. This step is crucial for the entire structure’s stability and proper rotation of the Ferris wheel.

4.2 Constructing the Ferris Wheel Frame

Attach vertical rods to the base corners‚ connecting them with horizontal bars to form the wheel’s circular frame. Use orange connectors to secure the rods‚ ensuring symmetry and even spacing. Install the support beams and circular track for the seats. Double-check alignment and tighten all connections to maintain structural integrity and ensure smooth rotation of the Ferris wheel.

4.3 Attaching the Seats and Safety Features

Secure the seats to the Ferris wheel frame using red connectors and clips. Attach each seat evenly around the circular track‚ ensuring proper spacing for balance. Add safety features like guardrails and seat belts to prevent accidents. Follow the instruction manual for precise alignment and tightening. Double-check all connections to ensure safe and sturdy seating for a smooth‚ worry-free operation of your K’NEX Ferris wheel.

4.4 Installing the Motor and Testing Rotation

Mount the motor securely to the base and connect it to the central axle of the Ferris wheel. Attach the power source and ensure all gears align properly. Test the rotation by running the motor at a slow speed. Check for smooth movement and balance. Adjust the motor’s alignment if necessary to achieve steady‚ even rotation without wobbling. Ensure the motor operates efficiently for optimal performance of your K’NEX Ferris wheel.

Tips for a Sturdy and Balanced Build

Use robust K’NEX pieces for the base and frame. Ensure all connections are secure and aligned properly. Tighten joints firmly to avoid wobbling. Balance the wheel by evenly distributing weight and using spacers if needed. Regularly check alignment to maintain stability and smooth rotation.

5.1 Ensuring Stability to Prevent Wobbling

A sturdy base is essential for stability. Use wide‚ balanced structures and secure all joints tightly. Ensure the frame is symmetrical and evenly weighted. Add spacers or supports at critical points to prevent leaning. Regularly check the base for levelness and tighten any loose connections. A stable foundation ensures smooth rotation and prevents wobbling during operation.

5.2 Balancing the Wheel for Smooth Rotation

Ensuring even weight distribution is key to smooth rotation. Check that all seats and structural elements are evenly spaced and aligned. Test the wheel by gently spinning it to identify imbalance. Adjust the placement of components or add counterweights if necessary. Proper balancing prevents uneven movement and ensures a steady‚ enjoyable rotation of your K’NEX Ferris wheel.

Troubleshooting Common Issues

Identify wobbling or rotation problems by checking loose connections or misaligned parts. Tighten joints and ensure proper alignment for stability and smooth operation of your Ferris wheel.

6.1 Diagnosing and Fixing Rotation Problems

Start by inspecting the gear system for misalignment or blockages. Ensure all gears are securely connected and properly lubricated. Check the motor’s power source and connections. If the wheel jerks or stalls‚ tighten loose rods and verify that all moving parts are free from obstruction. Test rotation slowly to identify and address any friction or imbalance issues promptly.

6.2 Solving Stability and Structural Issues

Ensure the base is level and securely anchored to prevent wobbling. Check for loose connections and tighten rods firmly. If the structure leans‚ adjust the balance by redistributing weight evenly. Reinforce weak points with additional connectors or rods. Regularly inspect for bent or warped pieces and replace them if necessary to maintain structural integrity and stability.

Customization and Creative Add-Ons

Add lights or decorative elements to make your Ferris wheel unique. Experiment with colors‚ themes‚ or additional features like moving parts for a personalized touch.

7.1 Adding Lights or Other Decorative Elements

Add lights or glow sticks to create a vibrant‚ illuminated Ferris wheel. Use LED strips or small lights to highlight the structure and seats. Decorative elements like stickers or themed accessories can enhance its appearance. Experiment with colors and designs to match your preferred theme‚ making it a unique and eye-catching display. Ensure decorations are securely attached to maintain balance and stability.

7.2 Modifying the Design for Unique Features

Customize your K’NEX Ferris wheel by modifying its design for unique features. Experiment with different sizes‚ shapes‚ or themes to create a one-of-a-kind structure. Add interactive elements like blinking lights or movable parts using additional K’NEX pieces. You can also incorporate themed accessories or paint for a personalized touch. Use online resources for inspiration‚ ensuring modifications maintain stability and functionality while showcasing your creativity.

Complete your K’NEX Ferris wheel project with a final inspection and testing. Display your creation proudly‚ showcasing your creativity and engineering skills. Congratulations on your accomplishment!

8.1 Final Inspection and Testing

Conduct a thorough final inspection of your K’NEX Ferris wheel to ensure all parts are securely connected. Test the rotation‚ checking for smoothness and balance. Verify that seats are attached properly and safety features function as intended. Make any necessary adjustments to ensure stability and optimal performance. This step guarantees your creation is both durable and fully operational.

8.2 Displaying Your Finished Ferris Wheel

Proudly showcase your completed K’NEX Ferris wheel in a visible location‚ such as a shelf or tabletop. Ensure the surface is sturdy and level to maintain stability. Add decorative elements like lights or paint for extra flair. This masterpiece reflects your creativity and engineering skills‚ making it a standout piece in any room. Sharing your finished project with others can inspire admiration and joy.

Additional Resources and Support

Explore official K’NEX websites‚ instruction manuals‚ and online forums for troubleshooting‚ creative ideas‚ and expert advice to enhance your Ferris wheel building experience and resolve challenges.

9.1 Where to Find Instruction Manuals and Guides

Official K’NEX websites offer downloadable instruction manuals for Ferris wheel sets‚ such as the 6-foot model (Product ID: 89790) and the 3-in-1 Classic Amusement Park (17035). Third-party sites like ManualsLib and ManualsOnline also provide access to these guides. Additionally‚ online marketplaces and community forums often share user-uploaded manuals for various K’NEX sets‚ ensuring you can find the specific instructions you need. Always verify the source for accuracy and safety.

9.2 Online Communities for K’NEX Enthusiasts

K’NEX enthusiasts can connect and share ideas through online forums‚ social media groups‚ and dedicated communities. Platforms like Reddit and Facebook host active groups where builders exchange tips and showcase their creations. These spaces foster collaboration‚ offering inspiration and support for both beginners and experienced builders working on Ferris wheels and other intricate designs.

Encouragement and Next Steps

Completing your K’NEX Ferris wheel is a testament to your creativity and perseverance. Use this achievement as motivation to explore more complex builds and innovative designs.

10.1 Motivation to Continue Building with K’NEX

Building a K’NEX Ferris wheel is a rewarding experience that sparks creativity and problem-solving skills. The sense of accomplishment motivates you to explore more complex designs‚ fostering confidence in your abilities. Each project enhances your understanding of mechanics and structure‚ encouraging you to push boundaries and take on new challenges with enthusiasm and innovation.

10.2 Exploring More Complex K’NEX Projects

After mastering the Ferris wheel‚ consider tackling more intricate K’NEX designs‚ such as roller coasters or bridges. These projects challenge your engineering skills and creativity‚ offering a sense of accomplishment as you bring complex ideas to life; Each new build enhances problem-solving abilities and fosters a deeper understanding of mechanics‚ encouraging you to innovate and push the boundaries of what’s possible.

vocabulary workshop level b pdf

Vocabulary Workshop Level B is a comprehensive program designed to enhance vocabulary skills through structured lessons and interactive activities‚ ideal for middle school students.

1.1 Overview of Vocabulary Workshop Series

The Vocabulary Workshop series is a structured program designed to improve vocabulary skills through engaging lessons and activities. It offers multiple levels‚ including Level B‚ each tailored to specific grade requirements. The series teaches 300 key words per level‚ selected based on their relevance‚ frequency‚ and appearance on standardized tests. Aligned with educational standards‚ it provides a comprehensive approach to vocabulary acquisition‚ preparing students for academic success and lifelong learning.

1.2 Importance of Vocabulary Development

Vocabulary development is essential for effective communication‚ reading comprehension‚ and academic success. A robust vocabulary enhances critical thinking and enables students to express ideas clearly. It also improves performance on standardized tests and fosters lifelong learning. Vocabulary Workshop Level B is designed to meet these needs by providing students with a strong foundation in word knowledge and usage.

1.3 Structure of Level B

Vocabulary Workshop Level B is organized into units‚ each containing a word list and exercises. It teaches 300 key words selected for their relevance and frequency. The structure includes reading passages‚ writing prompts‚ and vocabulary in context to reinforce learning. Aligned with educational standards‚ Level B provides a comprehensive approach to vocabulary development‚ ensuring students gain both understanding and practical application of new words.

Key Features of Vocabulary Workshop Level B

Vocabulary Workshop Level B offers PDF materials‚ interactive learning activities‚ and alignment with educational standards. It features word selection criteria‚ enhancing vocabulary acquisition and test preparation effectively.

2.1 Word Selection Criteria

Vocabulary Workshop Level B selects 300 key words based on criteria such as currency‚ general usefulness‚ frequency on recognized lists‚ applicability to standardized tests‚ and grade-level research. These criteria ensure that the words are relevant‚ practical‚ and aligned with educational standards‚ providing students with a robust foundation for vocabulary acquisition.

2.2 Interactive Learning Activities

Vocabulary Workshop Level B incorporates engaging activities like Reading Passages‚ Writing prompts‚ and Vocabulary in Context to enhance learning. These exercises help students apply words in meaningful scenarios‚ fostering deeper comprehension and retention. Interactive elements encourage active participation‚ making vocabulary acquisition both effective and enjoyable for students.

2.3 Alignment with Educational Standards

Vocabulary Workshop Level B aligns with key educational standards‚ including Language Standards for Vocabulary Acquisition and Use. It supports Reading Standards for Literature and Informational Texts‚ focusing on Craft and Structure. Additionally‚ it integrates with Writing Standards‚ emphasizing Text Types and Purposes. This alignment ensures the program meets curriculum requirements‚ providing teachers with a structured tool to teach vocabulary effectively while preparing students for standardized assessments.

Content and Organization

Vocabulary Workshop Level B is organized into units with word lists and exercises‚ including definitions‚ synonyms‚ antonyms‚ and sentence completions. It includes PDF materials and online resources.

3.1 Units and Word Lists

Vocabulary Workshop Level B is divided into 15 units‚ each containing . Units include word lists‚ definitions‚ synonyms‚ antonyms‚ and sentence completion exercises. PDF materials provide structured lessons‚ ensuring alignment with educational standards. Each word list is carefully curated to enhance vocabulary acquisition and test preparation‚ offering a comprehensive approach to language development for middle school students. Interactive activities and online resources further support learning.

3.2 Types of Exercises and Activities

Vocabulary Workshop Level B includes diverse exercises such as word definitions‚ synonyms‚ antonyms‚ sentence completions‚ and reading passages. Activities like Writing Prompts and Vocabulary in Context enhance understanding and retention. These exercises align with educational standards‚ fostering critical thinking and effective communication. Interactive elements‚ such as online games and tests‚ make learning engaging while preparing students for standardized assessments and real-world applications of language skills.

3.3 Progress Tracking and Assessment

Vocabulary Workshop Level B incorporates robust tools for monitoring student progress‚ including quizzes‚ unit tests‚ and cumulative assessments. The program provides detailed feedback‚ enabling students to identify strengths and areas for improvement. Teachers can track performance through the SadlierConnect platform‚ which offers customizable reports and resources to support individualized instruction and ensure mastery of vocabulary skills.

Benefits for Students

Vocabulary Workshop Level B enhances vocabulary acquisition‚ improves test preparation‚ and fosters critical thinking through engaging activities and structured exercises.

4.1 Enhanced Vocabulary Acquisition

Vocabulary Workshop Level B helps students build a strong foundation in word knowledge through high-frequency‚ grade-level words. Engaging exercises like definitions‚ synonyms‚ and context clues enhance understanding and retention. The program ensures students can apply vocabulary in reading‚ writing‚ and speaking‚ fostering better communication and academic success.

  • Expands understanding of word meanings and usage.
  • Improves ability to use context clues for unfamiliar words.
  • Enhances overall language proficiency and confidence.

4.2 Improved Test Preparation

Vocabulary Workshop Level B effectively prepares students for standardized tests by incorporating high-frequency words and exercises that mirror test formats. Features like practice tests‚ timed exercises‚ and reading passages enhance test-taking skills. The program aligns with educational standards‚ ensuring students master vocabulary commonly found on assessments‚ boosting confidence and performance.

  • Includes practice tests and interactive games for exam readiness.
  • Enhances speed and accuracy in processing vocabulary questions.
  • Develops strategies for tackling unfamiliar words in test settings.
  • 4.3 Development of Critical Thinking Skills

    Vocabulary Workshop Level B fosters critical thinking through exercises like context clues‚ synonyms‚ antonyms‚ and sentence completion. These activities encourage students to analyze word meanings and relationships‚ promoting deeper understanding and logical reasoning. Interactive games and reading passages further enhance analytical skills‚ preparing students to apply vocabulary in complex contexts.

    • Encourages analytical thinking through word relationships.
    • Enhances problem-solving skills with engaging activities.
    • Builds logical reasoning for real-world applications.
    • Digital and Online Components

      Vocabulary Workshop Level B offers digital resources‚ including PDF materials and online practice tests‚ to support learning. The SadlierConnect platform provides interactive activities and progress tracking tools.

      • Access to downloadable PDF materials for flexible study.
      • Interactive online games and quizzes for engagement.
      • Progress tracking features to monitor student improvement.
      • 5.1 Access to PDF Materials

        Vocabulary Workshop Level B offers downloadable PDF materials‚ providing flexible access to word lists‚ exercises‚ and answer keys. These resources support independent study and classroom instruction. Students can access PDFs through the SadlierConnect platform‚ enabling offline learning. The materials include interactive activities‚ reading passages‚ and writing prompts‚ designed to reinforce vocabulary acquisition. PDFs cater to diverse learning styles‚ offering a convenient way to engage with course content anytime‚ anywhere.

        5.2 Online Practice Tests and Games

        The Vocabulary Workshop Level B offers engaging online practice tests and games‚ accessible via the SadlierConnect platform. These interactive tools provide students with dynamic ways to reinforce vocabulary skills. Tests assess understanding‚ while games make learning fun and competitive. Features include timed exercises‚ word-matching activities‚ and progress tracking. These resources align with educational standards and cater to diverse learning preferences‚ ensuring an enriched and effective learning experience for all students.

        5.4 SadlierConnect Platform Features

        The SadlierConnect platform offers a range of features to support Vocabulary Workshop Level B. It provides digital access to resources‚ including interactive activities and progress tracking tools. Educators can assign tasks and monitor student performance seamlessly. The platform also includes multimedia enhancements and collaborative learning opportunities. Designed to integrate with classroom instruction‚ SadlierConnect ensures a cohesive and engaging learning experience‚ aligning with educational standards and fostering academic success for both students and teachers.

        Teaching Resources and Support

        The Teacher Edition provides comprehensive guides‚ lesson plans‚ and digital resources. SadlierConnect offers additional support‚ including interactive tools and progress tracking for effective instruction and student engagement.

        6.1 Teacher Edition and Guide

        The Teacher Edition of Vocabulary Workshop Level B provides a comprehensive guide‚ complete with lesson plans‚ teaching strategies‚ and support materials. It includes reproducible activities‚ answer keys‚ and tips for differentiated instruction. The guide aligns with educational standards and offers flexibility for teachers to adapt lessons to their classroom needs. Additionally‚ the SadlierConnect platform provides digital access to resources‚ enabling teachers to track student progress and deliver engaging instruction effectively.

        6.2 Classroom Activities and Strategies

        Vocabulary Workshop Level B offers a variety of engaging classroom activities to reinforce learning. These include word games‚ group discussions‚ and writing prompts that encourage students to apply vocabulary in context. Teachers can use structured lessons‚ interactive exercises‚ and technology integration to create dynamic learning experiences. The program also supports differentiated instruction‚ allowing teachers to cater to diverse learning needs and promote active participation in the classroom.

        6.3 Integration with Curriculum

        Vocabulary Workshop Level B aligns seamlessly with educational standards‚ supporting language acquisition‚ reading comprehension‚ and writing skills. The program integrates with curriculum goals by reinforcing vocabulary in context‚ enhancing reading strategies‚ and promoting effective writing. Teachers can incorporate activities into existing lesson plans‚ ensuring a cohesive learning experience. The structured approach complements core subjects‚ making it an essential tool for curriculum-aligned vocabulary development.

        Effectiveness and Reviews

        Vocabulary Workshop Level B has received positive feedback for improving test scores and enhancing critical thinking. Educators recommend it for its structured approach and alignment with curriculum standards.

        7.1 Student Feedback and Outcomes

        Students using Vocabulary Workshop Level B report improved test scores and increased confidence in vocabulary usage. Many find the interactive activities engaging‚ while the structured word lists and exercises enhance retention. Feedback highlights the program’s ability to make complex words accessible‚ fostering a deeper understanding of language. The resources‚ including online components‚ support personalized learning‚ leading to measurable progress in vocabulary acquisition and application.

        7.2 Educator Recommendations

        Educators highly recommend Vocabulary Workshop Level B for its structured approach and alignment with curriculum standards. The program’s teacher edition and guide provide comprehensive support‚ while interactive activities like reading passages and writing prompts engage students effectively. The inclusion of progress tracking tools and online resources enhances teaching efficiency‚ making it a valuable resource for vocabulary instruction in the classroom.

        7.3 Comparison with Other Levels

        Vocabulary Workshop Level B serves as an intermediate option in the series‚ offering 300 key words tailored for middle school students. It differs from Level A by introducing more advanced vocabulary‚ while being less complex than Levels C and D. The program’s interactive activities and alignment with curriculum standards make it a preferred choice for educators seeking a balanced approach to vocabulary development.

        Vocabulary Workshop Level B provides a structured and engaging approach to vocabulary development‚ offering 300 key words and interactive activities. Designed for middle school students‚ it aligns with educational standards and includes digital resources like PDF materials and online tests. With its comprehensive structure and support materials‚ Level B is an effective tool for enhancing vocabulary skills and preparing students for academic success.

2014 jeep wrangler owners manual

The 2014 Jeep Wrangler Owner’s Manual is a comprehensive guide providing essential information for optimal vehicle use, maintenance, and safety, available as a free PDF download.

1.1 Overview of the Manual

The 2014 Jeep Wrangler Owner’s Manual is a detailed guide covering vehicle operation, maintenance, and troubleshooting. It includes sections on features, technical specifications, and safety precautions. Available as a free PDF download, the manual provides comprehensive information to help owners understand and care for their vehicle effectively, ensuring optimal performance and longevity. It serves as an essential resource for both new and experienced drivers.

1.2 Importance of Reading the Manual

Reading the 2014 Jeep Wrangler Owner’s Manual is crucial for understanding vehicle features, maintenance requirements, and safety guidelines. It ensures proper operation, enhances driving safety, and helps prevent damage. Familiarizing yourself with the manual can improve overall ownership experience and help maintain the vehicle’s performance and longevity. It also provides troubleshooting tips and warranty information, making it an indispensable resource for all owners.

Key Features of the 2014 Jeep Wrangler

The 2014 Jeep Wrangler offers a robust six-speed manual transmission, classic two-door or four-door Unlimited design, and exceptional off-road capabilities, ensuring versatility and adventure readiness.

2.1 Exterior Features

The 2014 Jeep Wrangler boasts a classic, rugged design with a removable roof and doors, fold-down windshield, and iconic round headlights. Available in two-door and four-door Unlimited models, it features durable fender flares, a rear spare tire mount, and a range of wheel options; The exterior is built for off-road durability, with high ground clearance and skid plates for protection. Its timeless aesthetic appeals to both adventurers and enthusiasts, blending functionality with style.

2.2 Interior Features

The 2014 Jeep Wrangler’s interior is designed for functionality and durability, featuring washable surfaces and minimalistic controls. It offers seating for up to five passengers in the Unlimited model, with supportive bucket seats and ample legroom. The dashboard includes a central instrument cluster, auxiliary ports, and a touchscreen infotainment system. Storage compartments and cup holders are strategically placed for convenience, ensuring a practical and comfortable driving experience both on and off the road.

Controls and Instruments

The 2014 Jeep Wrangler features a straightforward instrument cluster with a speedometer, tachometer, and essential warning lights. Other controls include the gearshift, parking brake, and buttons for lights and wipers.

3.1 Instrument Cluster

The 2014 Jeep Wrangler’s instrument cluster includes a speedometer, tachometer, and fuel gauge. Additional features are odometer, trip odometer, and warning lights for oil pressure, battery, and seatbelts. The cluster is designed for clear visibility, ensuring drivers can monitor vital vehicle functions effortlessly. This section helps owners understand each indicator’s purpose and operation, promoting safe and informed driving experiences.

3.2 Other Controls

The 2014 Jeep Wrangler features intuitive controls for heating, air conditioning, and multimedia systems. The HVAC controls allow for easy temperature and airflow adjustments, while the infotainment system includes buttons for radio, Bluetooth, and USB connectivity. Additional controls manage lighting, including the headlight switch and interior dimmer. These components are designed for convenience, enabling drivers to customize their driving experience without distraction.

Maintenance and Service

The 2014 Jeep Wrangler Owner’s Manual outlines essential maintenance schedules, service tips, and fluid capacity guidelines to ensure optimal vehicle performance and longevity.

4.1 Maintenance Schedule

The 2014 Jeep Wrangler Owner’s Manual provides a detailed maintenance schedule, outlining recommended services at specific intervals, such as oil changes, tire rotations, and filter replacements, to ensure the vehicle runs efficiently and maintains its durability. Regular adherence to this schedule helps prevent potential issues and extends the life of the Wrangler, ensuring optimal performance both on and off the road.

4.2 Common Maintenance Tips

The 2014 Jeep Wrangler Owner’s Manual provides practical maintenance tips to ensure longevity and optimal performance. Regularly check fluid levels, inspect the battery, and monitor tire pressure. Addressing minor issues promptly can prevent major repairs. These tips empower owners to maintain their vehicle effectively, ensuring it remains reliable for both on-road and off-road adventures.

Four-Wheel-Drive System

The 2014 Jeep Wrangler features a robust four-wheel-drive system designed for enhanced traction and control. It seamlessly adapts to various driving conditions, ensuring superior off-road performance and stability.

5.1 How the 4WD System Works

The 2014 Jeep Wrangler’s four-wheel-drive system operates by transferring engine power to all four wheels, improving traction. It features a two-speed transfer case with a 4:1 low-range gear ratio for challenging terrain. The system can be manually engaged, allowing drivers to switch between two-wheel and four-wheel drive modes. This setup ensures optimal performance on both paved roads and off-road trails, enhancing versatility and control in various driving conditions while maintaining stability and reliability.

5.2 Benefits and Usage

The 4WD system in the 2014 Jeep Wrangler enhances traction, stability, and control, making it ideal for off-road adventures. It improves performance on uneven terrain, such as mud, sand, or rocks, by distributing power evenly to all wheels. The low-range gearing provides additional torque for crawling over steep inclines or towing heavy loads.

Engage 4WD on loose or slippery surfaces for better grip. Use 4H for higher speeds and 4L for extreme conditions. Proper usage ensures maximum capability and prevents system damage, making it a key feature for both recreational and utility driving.

Troubleshooting Common Issues

The 2014 Jeep Wrangler Owner’s Manual provides detailed solutions for common issues, ensuring optimal performance and safety through regular checks and scheduled maintenance.

6.1 Diagnosing Problems

The 2014 Jeep Wrangler Owner’s Manual guides users in identifying issues through warning lights, unusual noises, and performance changes. It outlines steps to check fluid levels, battery health, and tire pressure. The manual also explains how to use diagnostic tools and troubleshoot common faults, ensuring timely repairs and preventing further damage. Regular maintenance schedules are included to help owners detect potential problems early, maintaining optimal vehicle performance and safety.

6.2 Warning Lights and Solutions

The 2014 Jeep Wrangler Owner’s Manual details warning lights on the instrument cluster, such as the check engine, battery, or oil pressure lights. Each light indicates specific issues, guiding owners to take appropriate actions. The manual provides explanations and steps to address these warnings, ensuring timely resolution. Regular checks and maintenance can prevent illuminated warnings, while severe issues may require professional assistance to maintain vehicle health and safety.

Technical Specifications

The 2014 Jeep Wrangler features a 3.6L V6 engine, producing 285 horsepower and 260 lb-ft torque. It includes a six-speed manual transmission, 17-inch wheels, and a 22.5-gallon fuel capacity.

7.1 Engine Specifications

The 2014 Jeep Wrangler is powered by a 3.6L V6 Pentastar engine, delivering 285 horsepower at 6,400 rpm and 260 lb-ft of torque at 4,800 rpm. This engine features variable valve timing for enhanced performance and efficiency. It is paired with a six-speed manual transmission, providing smooth shifting and optimal control. The engine’s design ensures reliable off-road capability while maintaining satisfactory on-road performance.

7.2 Fluid Capacities and Dimensions

The 2014 Jeep Wrangler requires 5 quarts of engine oil (5W-20). Coolant capacity is approximately 10 liters, while transmission fluid capacity is 4 quarts. Brake fluid and power steering fluid capacities are 1 liter each. Vehicle dimensions include a length of 173.4 inches, width of 73.7 inches, and height of 70.9 inches, ensuring a compact yet robust design for both on-road and off-road adventures.

Transmission and Performance

The 2014 Jeep Wrangler features a six-speed manual transmission, delivering smooth shifting and enhanced control. It achieves 0-60 mph in 7.7 seconds for the two-door and 8.4 seconds for the Wrangler Unlimited.

8.1 Six-Speed Manual Transmission

The 2014 Jeep Wrangler’s six-speed manual transmission offers precise control and smooth shifting, enhancing both on-road and off-road performance. Designed for optimal acceleration, it provides quick responses, making it ideal for various driving conditions. This transmission contributes to the Wrangler’s legendary capability and driver engagement, ensuring a balance between power delivery and fuel efficiency. Its durability and reliability make it a key feature for enthusiasts and adventurers alike.

8.2 Performance and Fuel Efficiency

The 2014 Jeep Wrangler delivers robust performance with its 3.6L V6 engine, achieving 0-60 mph in 7.7 seconds for the two-door model and 8.4 seconds for the Unlimited. It balances power with efficiency, offering an EPA-estimated 17 mpg city and 21 mpg highway. The six-speed manual transmission enhances fuel economy while providing precise control for both on-road driving and off-road adventures, making it a versatile choice for diverse driving conditions.

Off-Road Capabilities

The 2014 Jeep Wrangler excels in off-road environments with its robust 4WD system, high ground clearance, and durable suspension. Designed for challenging terrains, it ensures unmatched traction and stability, making it a reliable choice for adventures beyond paved roads.

9.1 Suspension and Axle

The 2014 Jeep Wrangler features a robust suspension system, including a front and rear stabilizer bar, designed to enhance stability during off-road adventures. The axle setup provides superior articulation and durability, ensuring optimal performance on uneven terrains. This combination allows for maximum ground clearance and articulation, enabling the Wrangler to tackle challenging trails with ease and confidence, making it a top choice for off-road enthusiasts.

9.2 Tips for Off-Road Driving

For a safe and enjoyable off-road experience, ensure your 2014 Jeep Wrangler is properly equipped and maintained. Always engage four-wheel drive in low-traction conditions and use low gear for steep inclines. Check tire pressure, suspension, and fluid levels before heading off-road. Avoid sudden movements and maintain a steady speed. Carry emergency supplies like a spare tire, jack, and tow strap. Familiarize yourself with the terrain and use extreme caution on uneven or rocky surfaces to prevent damage and ensure safety.

Warranty and Service Information

The 2014 Jeep Wrangler comes with a comprehensive warranty covering basic and powertrain components. Regular maintenance is crucial for warranty validity and optimal vehicle performance.

10.1 Understanding Your Warranty

Your 2014 Jeep Wrangler warranty provides coverage for basic components and powertrain. It ensures repairs are covered for defects in materials or workmanship. Duration and mileage limits apply. Regular maintenance is required to maintain warranty validity. understanding the terms and conditions ensures you maximize coverage benefits and avoid unexpected repair costs. Always refer to the manual for detailed warranty specifics and exclusions.

10.2 Service Contracts and Extended Warranty

Service contracts and extended warranty options for the 2014 Jeep Wrangler provide additional protection beyond the standard warranty. These plans, such as FlexCare, offer coverage for repairs and replacements of parts and labor. They can be tailored to your needs, offering flexibility and peace of mind. Extended warranties are honored at authorized dealerships, ensuring continued support for your vehicle. Always review terms and conditions to understand coverage limits and exclusions.

Safety Features and Precautions

The 2014 Jeep Wrangler Owner’s Manual outlines essential safety features, precautions, and best practices to ensure a secure driving experience. It covers child restraint installation, airbag systems, and safe driving tips to help you operate your vehicle confidently and responsibly under various conditions.

11.1 Safety Features Overview

The 2014 Jeep Wrangler Owner’s Manual highlights advanced safety features, including dual front airbags, anti-lock brakes, and electronic stability control. These features work together to enhance driver and passenger protection, ensuring a secure driving experience both on and off the road. The manual also emphasizes proper usage of seat belts and child restraints to maximize safety outcomes.

11.2 Safe Driving Practices

The 2014 Jeep Wrangler Owner’s Manual emphasizes safe driving practices, such as adjusting mirrors and seats before driving, wearing seat belts, and avoiding distractions. It also highlights the importance of being attentive, especially during off-road driving. Proper use of child restraints and adherence to speed limits are stressed to ensure a safe experience for all occupants.

avaya 9608 telephone user guide

The Avaya 9608 IP Deskphone is a sleek, high-performance communication device designed for businesses. It features an intuitive interface, HD audio, and 24 programmable buttons for enhanced productivity.

Overview of the Avaya 9608 IP Deskphone

The Avaya 9608 IP Deskphone is a high-performance, enterprise-grade communication device designed for businesses. It features a sleek, modern design with a backlit display and supports up to 24 programmable call appearance or feature buttons. Equipped with HD audio, the phone ensures crystal-clear voice quality, while its Gigabit Ethernet support enhances network performance. Part of the Avaya IP Office platform, it’s ideal for users requiring reliable and efficient communication solutions. The phone is suitable for various business roles, from general office use to more demanding environments.

Importance of the User Guide for Effective Utilization

The user guide is essential for maximizing the potential of the Avaya 9608 IP Deskphone. It provides detailed instructions for setup, button functionality, and feature customization, ensuring users can navigate the phone’s capabilities seamlessly. By understanding the guide, users can troubleshoot common issues, optimize call handling, and leverage advanced features like call forwarding and voicemail. This empowerment enhances productivity and communication efficiency, making the guide a vital resource for both new and experienced users.

Physical Features and Components

The Avaya 9608 features a sleek, ergonomic design with a high-resolution display, backlit keypad, and 24 programmable buttons. It includes a built-in speakerphone and headset jack, ensuring versatility and comfort for users.

Display and Button Layout

The Avaya 9608 features a high-resolution, monochrome display providing clear call information and menu options. The intuitive button layout includes 24 programmable call appearance/feature buttons, each with customizable labels displayed on the screen. Additional buttons for speakerphone, headset, and voicemail access enhance user convenience. The phone’s design ensures easy navigation, allowing users to manage calls and features efficiently. The display’s brightness can be adjusted for optimal viewing comfort in various lighting conditions.

Programmable Call Appearance/Feature Buttons

The Avaya 9608 IP Deskphone features 24 programmable call appearance and feature buttons, allowing users to customize their communication experience. These buttons can be assigned to specific functions such as call forwarding, transfer, or speed dial, enhancing productivity. The labels for these buttons are displayed on the main screen, ensuring easy identification. Users can program the buttons according to their preferences, either directly on the phone or through Avaya’s software tools, making it a flexible solution for diverse workplace needs.

Installation and Setup

The Avaya 9608 IP Deskphone installation involves connecting it to a network using an Ethernet cable. Power options include PoE or an external adapter for convenience.

Connecting the Phone to the Network

To connect the Avaya 9608 IP Deskphone, use an Ethernet cable to link it to your local area network (LAN). Plug one end into the phone’s Ethernet port and the other into a nearby network jack. Ensure the network switch is Power over Ethernet (PoE) enabled to power the phone. If PoE is unavailable, use an external power adapter. Once connected, the phone will automatically detect the network and initiate the registration process. This step is crucial for enabling all features and functionalities.

Powering Options (PoE and External Adapter)

The Avaya 9608 IP Deskphone supports two power options: Power over Ethernet (PoE) and an external power adapter. For PoE, connect the phone to a PoE-enabled network switch, eliminating the need for a separate power source. If PoE is unavailable, use the provided external power adapter to connect the phone to a standard electrical outlet. Both options ensure reliable operation, with PoE offering convenience and the adapter providing flexibility for non-PoE environments. Always use Avaya-approved adapters to maintain compatibility and safety.

Basic Call Handling

The Avaya 9608 supports essential call management features. Users can easily make calls, answer incoming calls, and manage call states like hold or transfer.

Making and Receiving Calls

Making a call on the Avaya 9608 is straightforward: press a line button, dial the number, and lift the handset or press the speakerphone key. For incoming calls, the phone rings and displays caller information. To answer, lift the handset or press the speaker button. The MESSAGE key flashes for voicemail, and pressing it connects you to your voicemail. The phone also supports call handling features like hold, transfer, and mute, ensuring efficient communication management.

  • Press a line button to select an available line.
  • Dial the desired number using the keypad.
  • Use the speakerphone or handset to connect the call.
  • For incoming calls, the phone rings and displays caller details.
  • Answer by lifting the handset or pressing the speaker button.

Using the Speakerphone and Headset

The Avaya 9608 supports high-quality speakerphone and headset use for hands-free communication. To activate the speakerphone, press the SPEAKER button, which illuminates when in use. For headset functionality, connect a compatible headset and press the HEADSET key to switch calls between the handset and headset. These features enhance convenience and productivity, allowing users to manage calls efficiently without physical constraints.

  • Press the SPEAKER button to enable hands-free calls.
  • Use the HEADSET key to toggle between devices.
  • Ensure the headset is properly connected for optimal audio quality.

Advanced Features

The Avaya 9608 offers advanced call management features like call forwarding, transfer, and conferencing. It also supports voicemail integration and customizable call profiles for enhanced productivity.

Call Forwarding and Transfer

The Avaya 9608 supports call forwarding, allowing users to redirect incoming calls to another number or voicemail. Call transfer enables seamless movement of calls to other extensions or external numbers. These features enhance flexibility and ensure calls are managed efficiently. Users can activate call forwarding directly from the phone or through system settings, providing a convenient solution for handling calls when unavailable. This functionality streamlines communication and improves overall productivity in a business environment.

Conference Calling and Voicemail Access

The Avaya 9608 supports conference calling, enabling users to host or join multi-party conversations with ease. Voicemail access allows users to retrieve and manage messages directly from the phone. The message waiting indicator alerts users to new voicemail, and the phone provides options for message retrieval and playback. These features enhance communication efficiency and ensure users stay connected and informed. The user guide offers detailed instructions for setting up and using these advanced functionalities effectively.

Customization and Configuration

The Avaya 9608 allows users to customize settings and configure features to suit their preferences, enhancing communication efficiency and personalizing their phone experience effectively.

Programming Feature Buttons

The Avaya 9608 IP Deskphone offers 24 programmable call appearance and feature buttons, allowing users to customize their communication experience. These buttons can be configured to perform various functions such as call forwarding, speed dialing, or accessing specific features like voicemail or conference calling. The labels for these buttons are displayed on the phone’s main screen, making it easy to navigate and use the programmed functions efficiently. This feature enhances productivity by providing quick access to frequently used operations, streamlining daily tasks and improving overall user experience.

Setting Up Call Profiles and Preferences

The Avaya 9608 IP Deskphone allows users to customize call profiles and preferences to suit their communication needs. You can configure incoming call handling for different scenarios, such as enabling Do Not Disturb or setting specific ring patterns. Additionally, users can define preferences for audio settings, display brightness, and feature accessibility. These settings can be adjusted directly on the phone or through the Avaya platform, ensuring a personalized experience. This customization enhances productivity by tailoring the phone’s behavior to individual or team requirements, reducing distractions and improving call management efficiency. Detailed steps are provided in the user guide.

Troubleshooting Common Issues

The Avaya 9608 telephone user guide provides solutions for common issues, such as connectivity problems or audio quality. Refer to the guide for detailed troubleshooting steps.

Diagnosing Connectivity Problems

To diagnose connectivity issues with the Avaya 9608 telephone, start by checking the physical connections. Ensure the Ethernet cable is securely plugged in and the network is operational. Verify that Power over Ethernet (PoE) is enabled or use an external power adapter if necessary. Check the phone’s IP configuration to ensure it aligns with your network settings. If issues persist, consult the user guide for advanced troubleshooting steps or contact your IT support team for assistance.

Resolving Audio and Display Issues

To resolve audio issues on the Avaya 9608, ensure the speakerphone and headset are properly connected. Adjust volume levels using the side buttons. For display problems, restart the phone or check brightness settings. If the display is unresponsive, verify firmware updates or reset to factory settings. Consult the user guide for detailed troubleshooting steps or contact technical support for further assistance. Regular maintenance ensures optimal performance and clear communication.